Today, I’m going to talk about one thing: sewing. Not only have I been actually doing it, but I’m actually making things that don’t look like they were sewn in home economics class. Yes! Ten points for housewife challenge number four. My latest and most thrilling project? [JPG, 1.74 MB]A curtain for Nora’s play kitchen. Isn’t it adorable?
In “researching” play kitchens for inspiration, I discovered the cuteness that is a a tiered, ruffled curtain under the sink. And of course, Nora’s kitchen had to have one. I’m especially proud of this, because I made it without a pattern and because it was my first real attempt at gathering, which I now know is super easy. I’ll probably make her a matching apron, and I think there might be all kinds of tiered, ruffled dresses and skirts in my future.
For those of you who are interested in the how, here’s a little tutorial on how I made it (nothing fancy and I don’t have pictures of the early steps, but you’ll get the idea). This is also the second installation of posts leading up to the big play kitchen reveal.
First, I picked out all of my fabrics. I bought a half yard each of the gingham and floral (because I have other things in mind for it), plus a couple of fabric samples from the store’s scrap table, and 24″ of eyelet trim. I measured the space where the curtain would go to decide how to cut my fabric; it’s 14″ wide by 12.5″ tall. Then I cut and finished all of the edges of my fabric. I even did it right and broke out the iron!
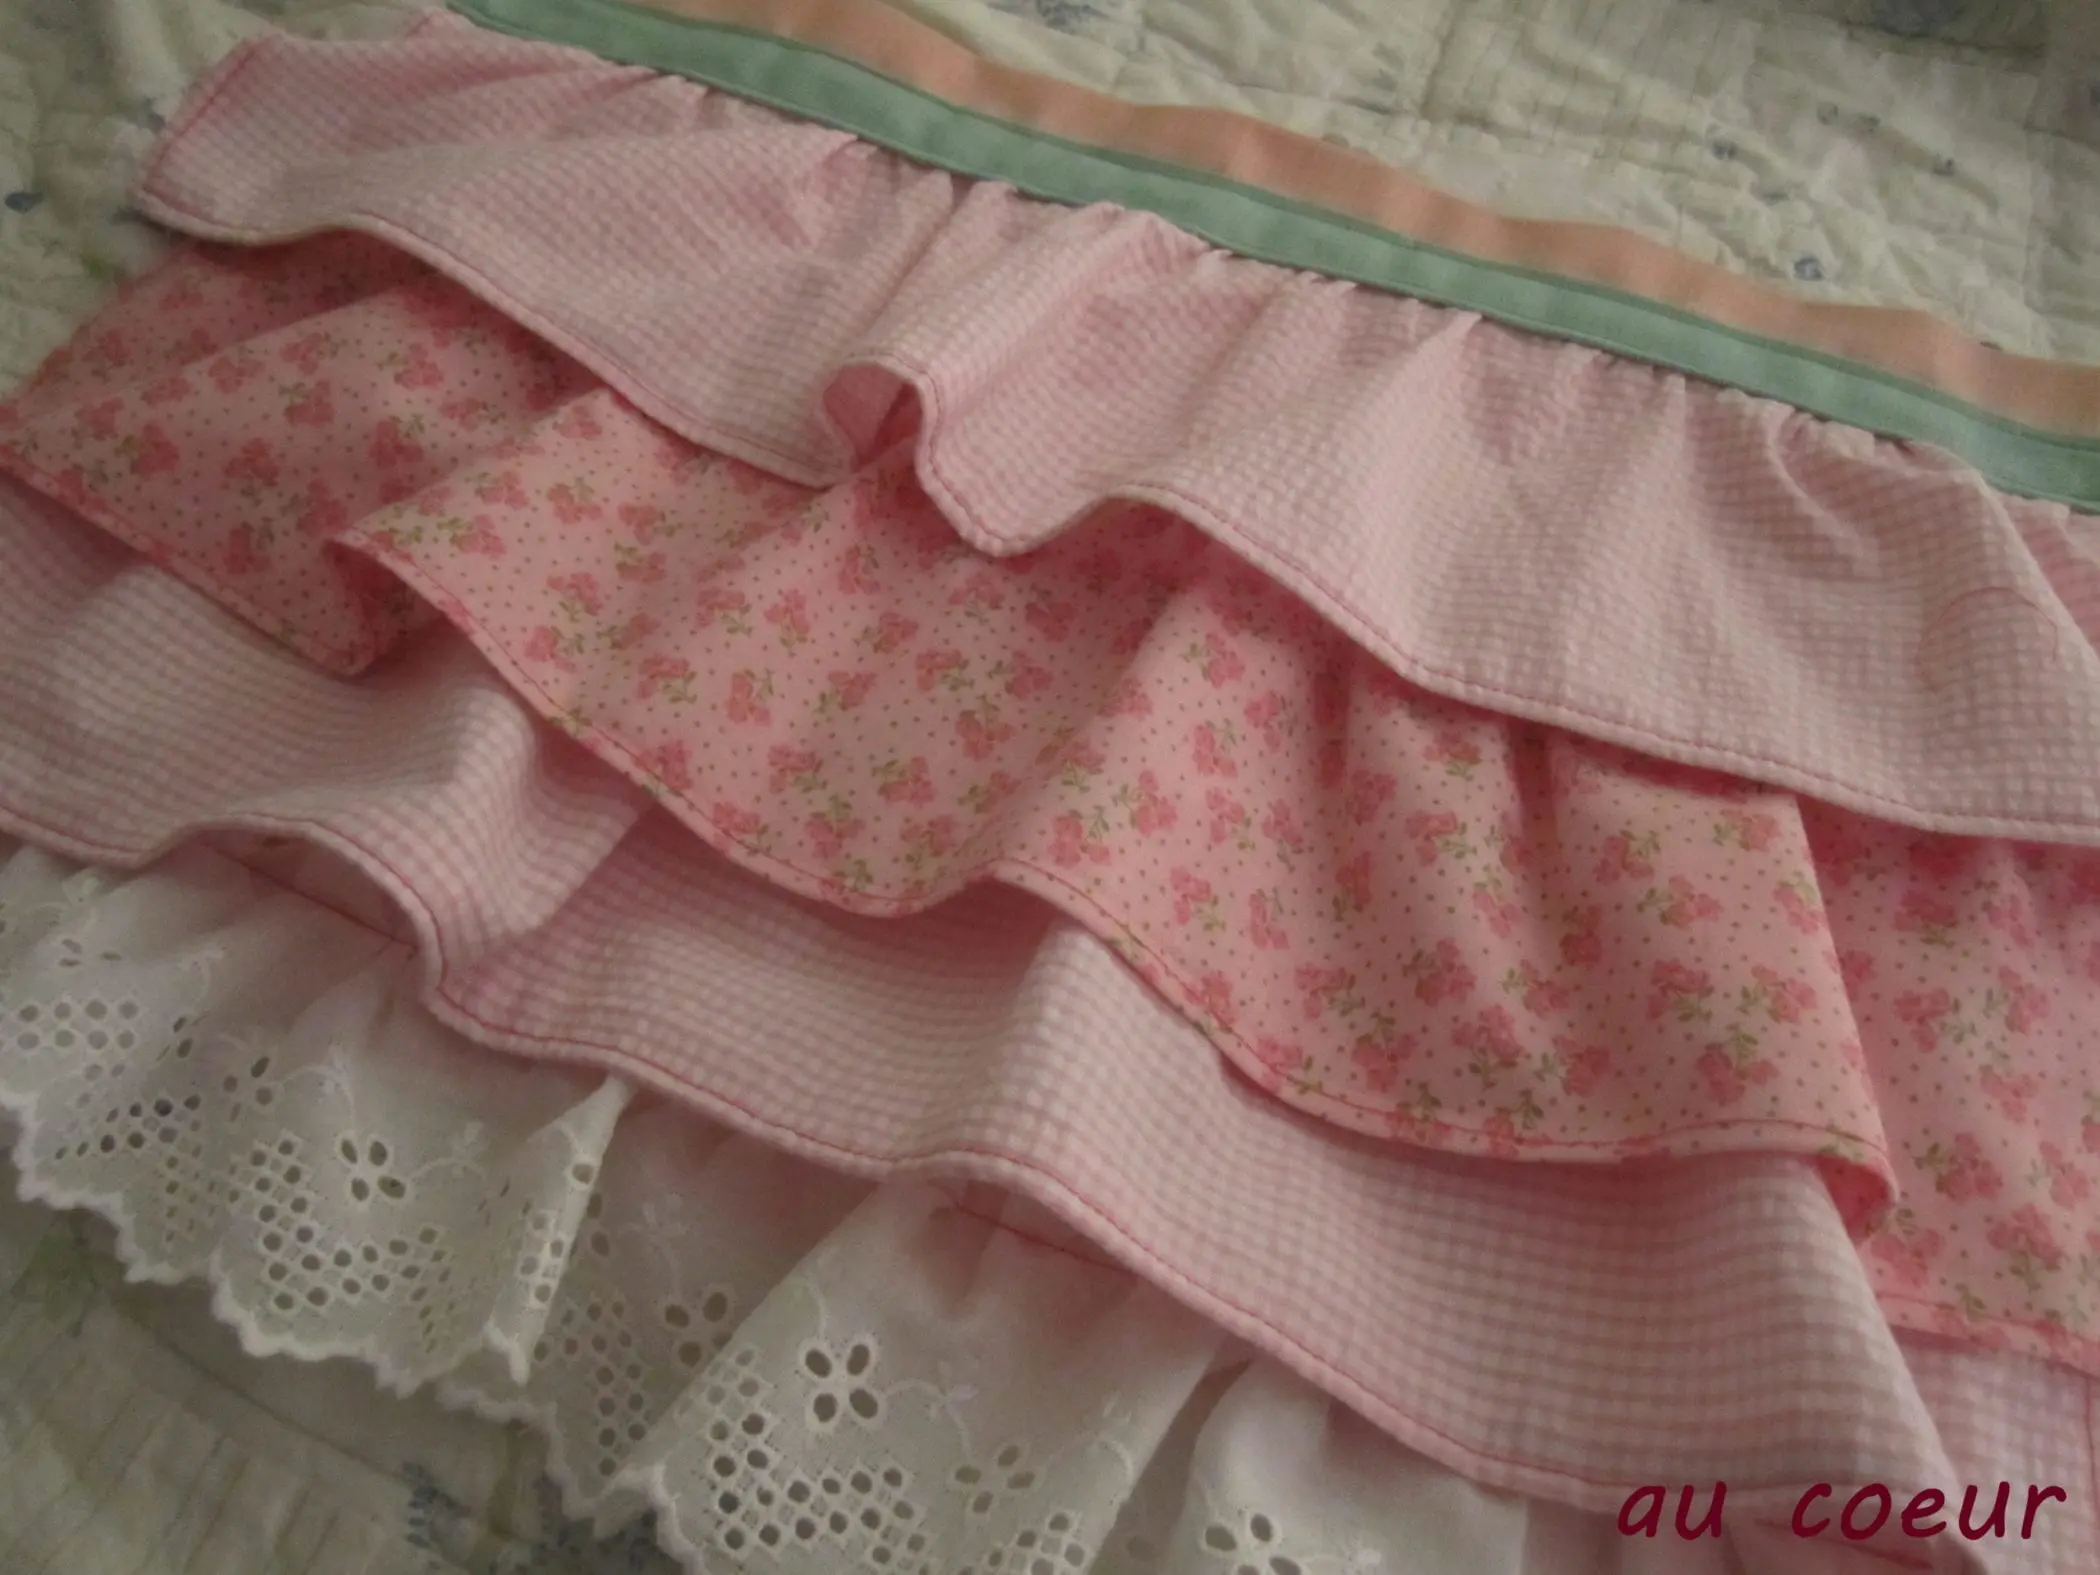
I decided that it was okay for the curtain to be a little wider than the space, so I used one of the fabric samples as is for the main back panel of the curtain (what the ruffles were sewn on to). After finishing the edges, I sewed a rod pocket on the top, which left me with a 16″ by 11″ panel. I cut two gingham and one floral pieces 23″ wide by 6″ tall; finishing three edges (sides and bottom) made each piece 22″ by 5″. I totally just eye-balled this. Basically, you want the strips of fabric wide enough to allow for the gather (wider = greated gather, narrower = less) and tall enough that the tiers will overlap. I left the eyelet trim 24″ long so that it would be more gathered/ruffled than the other tiers.
Starting with the bottom tier (in my case the eyelet trim), run it through the sewing machine with the longest stitch length (I.e. basting). Repeat within 1/2″ so that there are two parallel lines of loose stiching across the top of the fabric. The stitches should have already started to gather the fabric, but it can be made looser or tighter by pulling on the threads.

Pin into place on bottom of curtain panel. I had to make my trim hang lower than the panel to get the needed 12.5″ length.
 [JPG, 1.71 MB]With a regular stitch length, sew the bottom tier onto the panel.

Normally, they recommend sewing your line between the two basted rows, and I did that for the most part, but I also paid attention to how I wanted the stitching to fall. Here, I wanted it higher up, so I sewed above my two basted rows; in other cases, I didn’t stay even in the middle of the two rows, because I noticed it’s hard to get the two rows straight when pinning (because of the gather) and I wanted my final stitching to be straight. I didn’t noticed any difference if I sewed in or out of the basted rows.
After attaching the tier to the panel, gently tug the threads from the basted rows to pull them out of the fabric.

Ta da! You have one gathered tier!! If you’re me, you then get really excited and go show it to your husband and talk about how incredibly easy it is to gather.
Repeat with additional fabric rows, working from the bottom up and making sure to overlap each row over the one below it (to hide the stitching).
I also made a point of measuring (from the top) as I pinned to ensure that the rows were equal distance apart and straight.

Once all the rows were added, it looked like this:
 [JPG, 1.33 MB]
To cover up the top row’s stitching and edge, I placed a contrasting piece of fabric (with all four edges ironed under) on scross the raw edge (and the visible stitching from the rod pocket) and top-stitched across the top and bottom. The final, finished product looks like this.
 [JPG, 2.06 MB]I love it!
Leave a Reply