• About
  • Speaking
  • Consulting
  • Amber Hinds

  • Journal
  • Press
  • Contact

Amber Hinds

DIY
/
September 1, 2011

Nora’s Vintage-Inspired, Upcycled Play Kitchen

About 10 seconds after I knew I had a little girl, I knew she was eventually going to have a play kitchen.  It’s one of those things on the list of “things I didn’t have but always wanted” (a really cool play house is, too).  This past winter when I saw how much all of the kids loved to play with the kitchen at the ECC, I found myself wondering how we could get our hands on one.  It’s not as simple as just running out to Toys’R’Us when you live on Nantucket, and besides that, I wanted to avoid an ugly plastic monstrosity and am on a tight budget.  So, when I found out that Mr. V’s family would not be returning to the island this summer, I was really sad…but I was also quick to ask after the wooden play kitchen they had left behind.  I lucked out, and it was still in their old apartment; so in May, we brought this home:
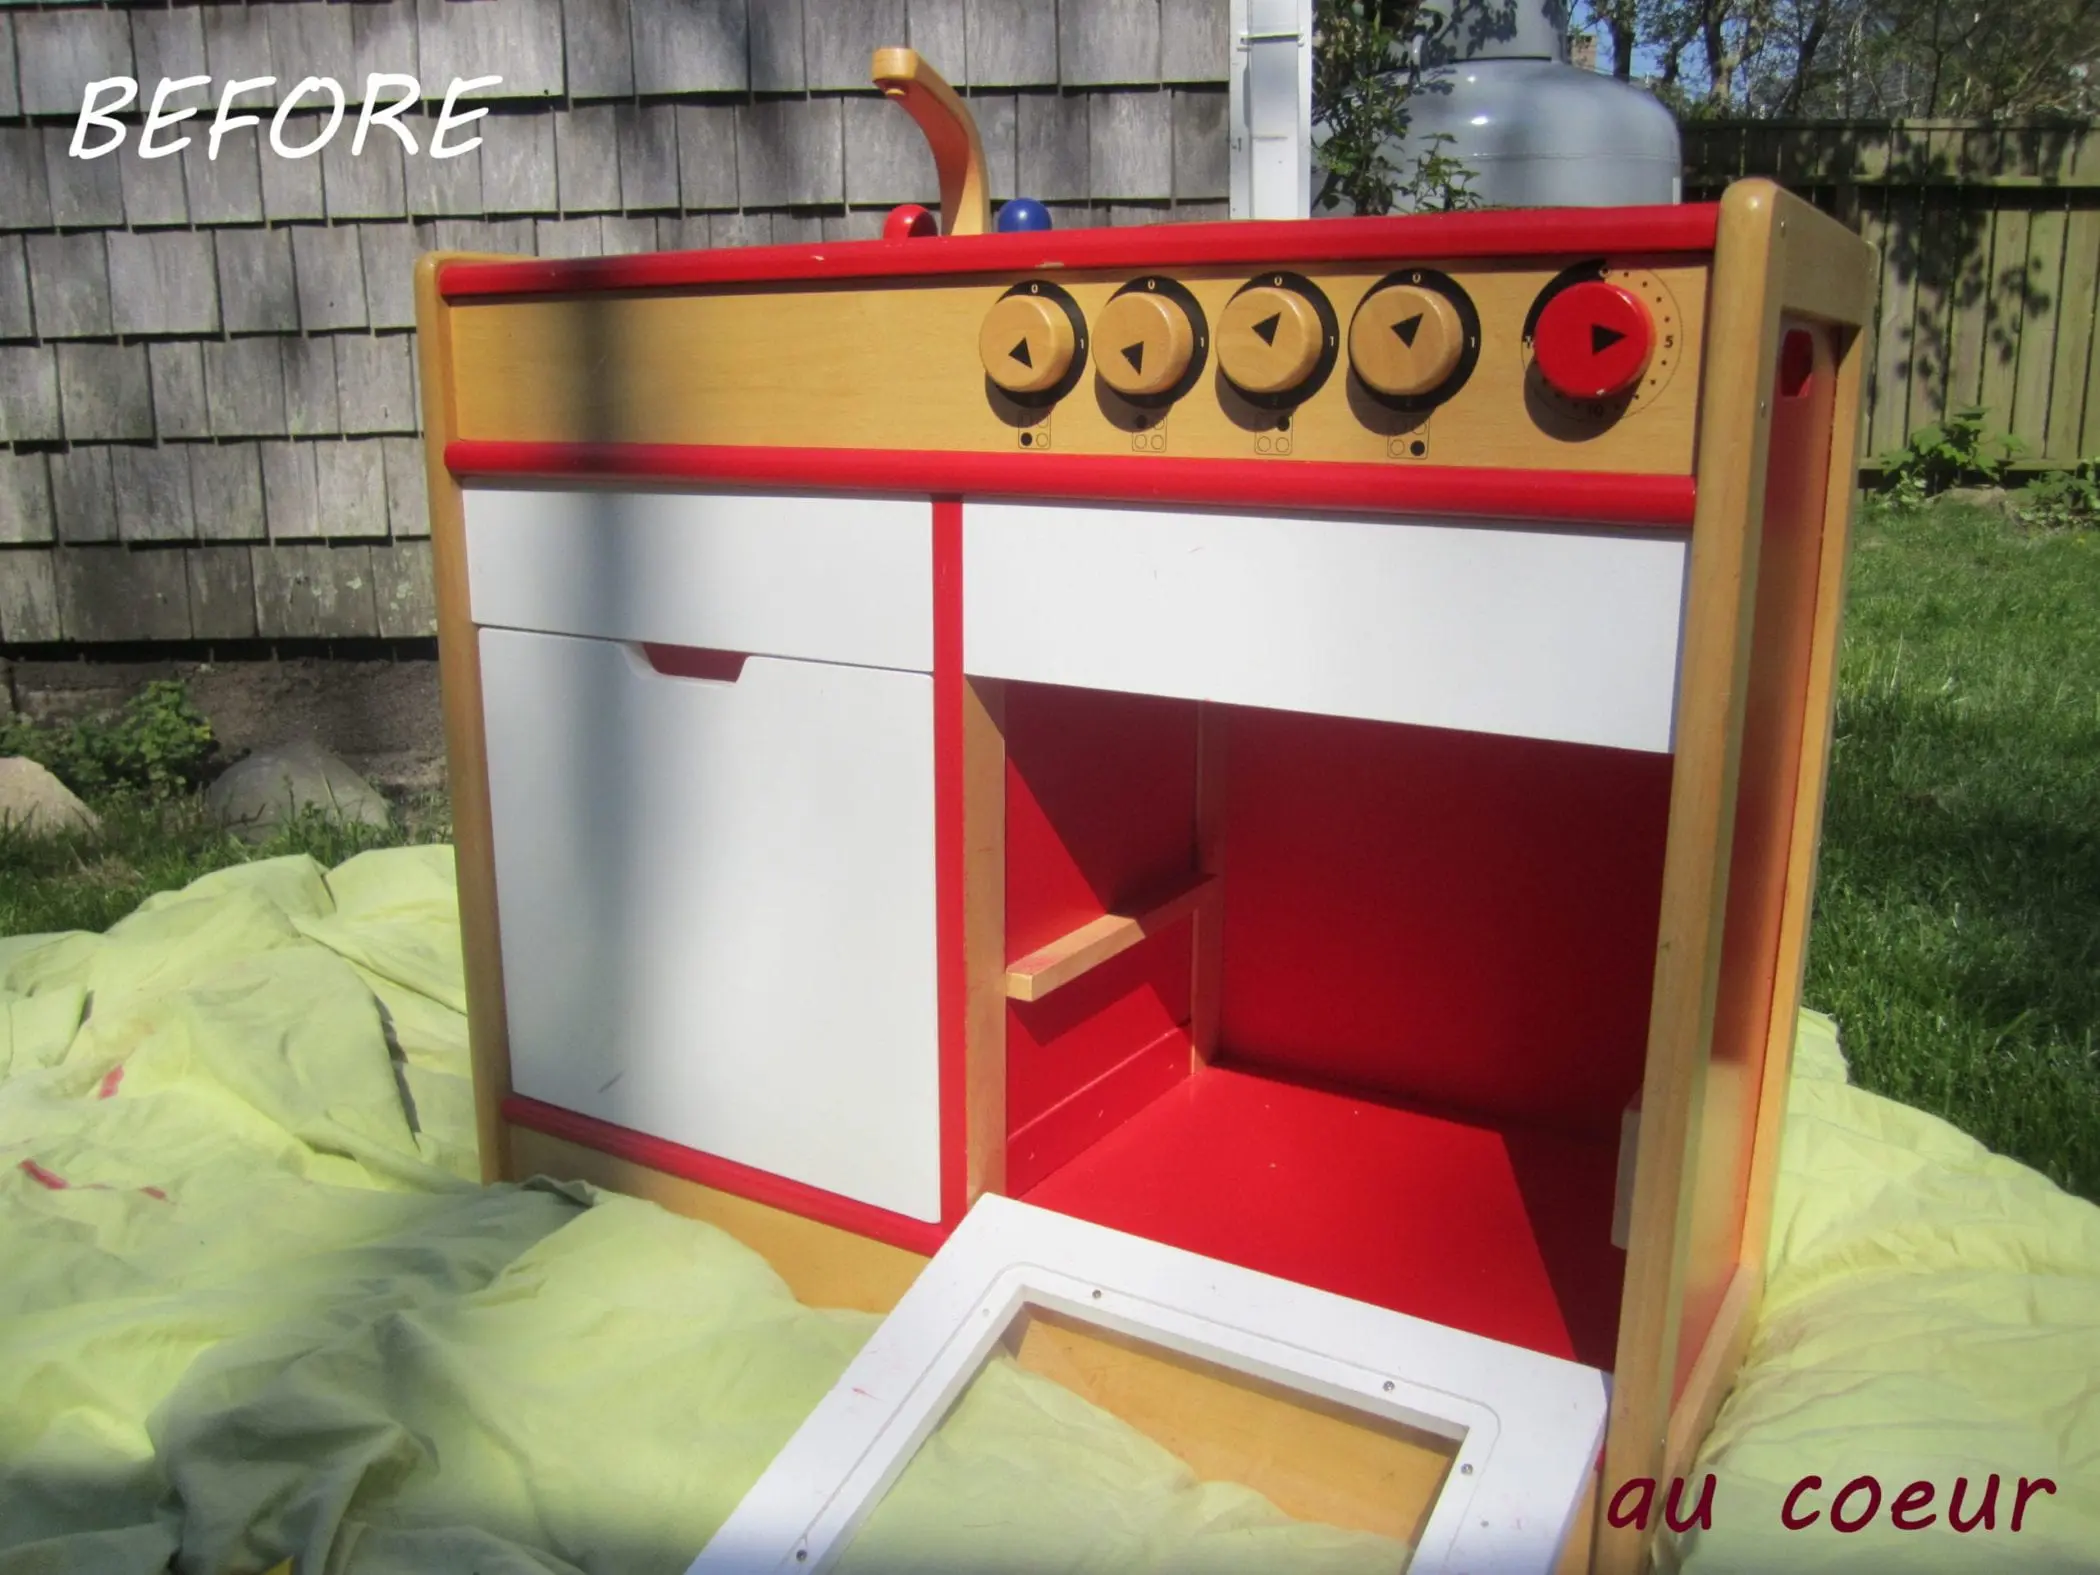
Not really my style, but you can’t beat free!  I figured we’d slap some primer and paint on it so it wouldn’t stick out like a sore thumb, and all would be happy in our dining room.  Problem was, it was missing the sink bowl.
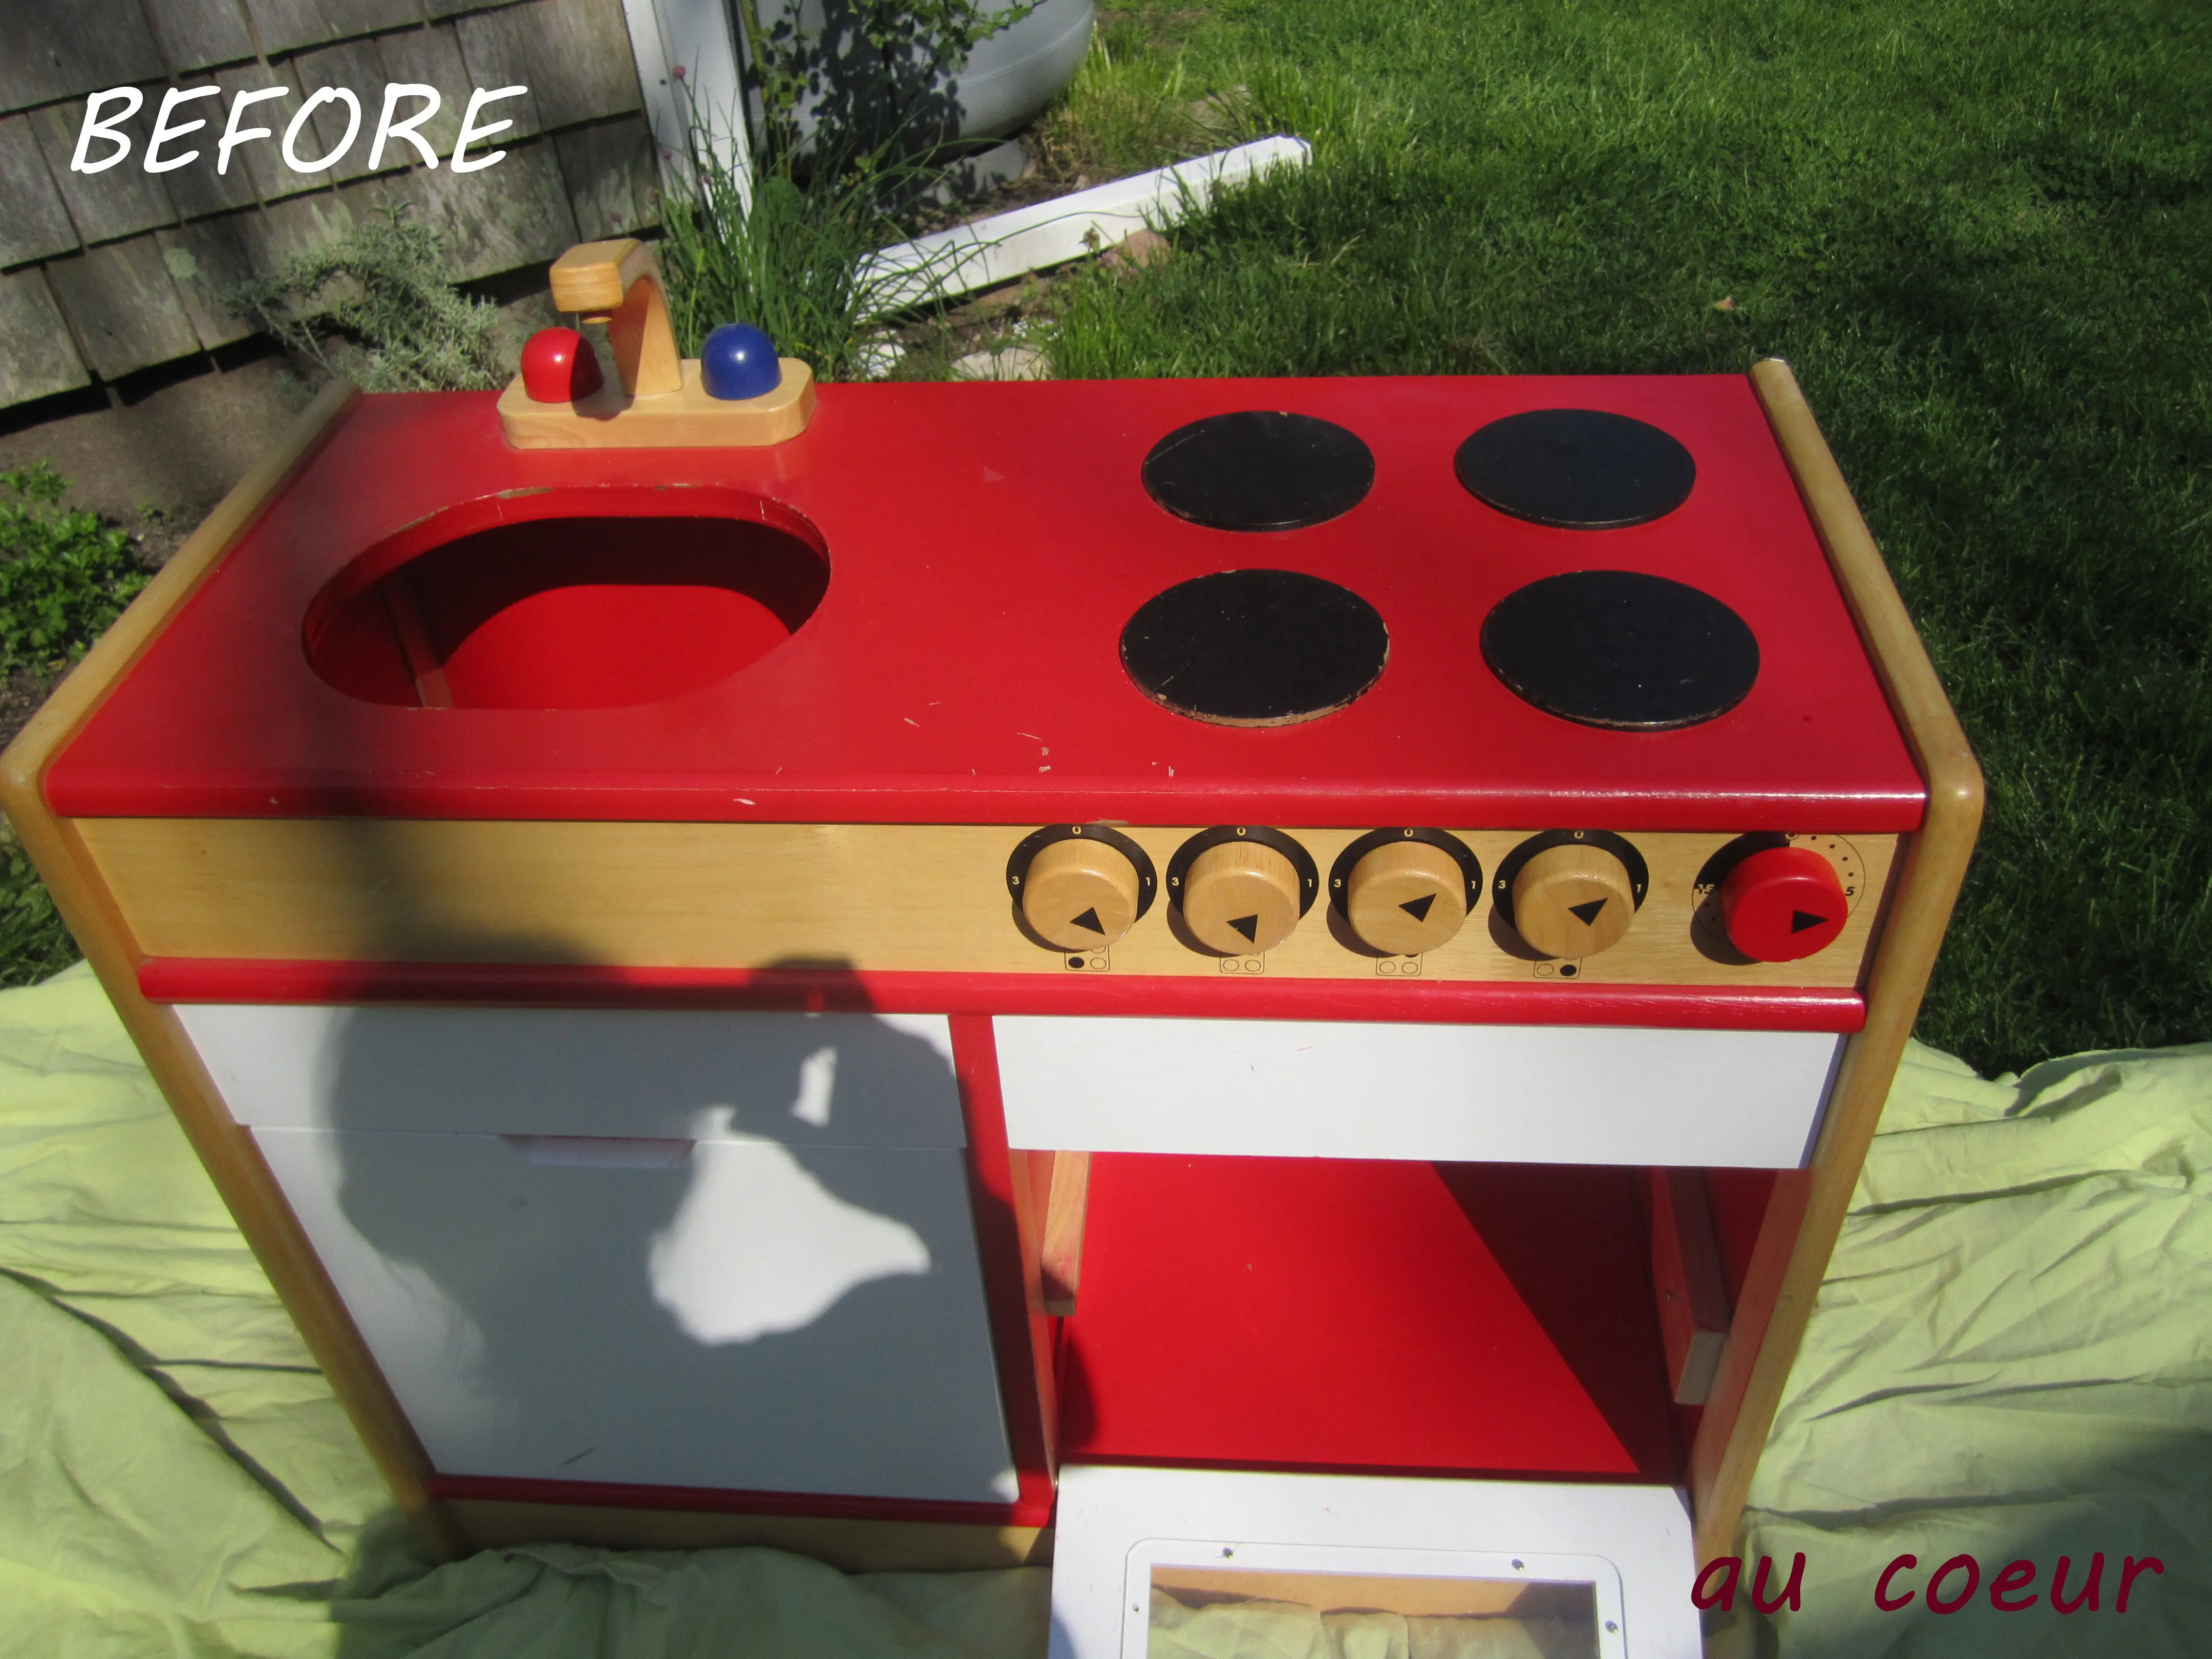
And since the hole was oval, replacing the bowl was near to impossible.  I tried reaching out to the manufacturer (outside of the US) or sales people (in the US) and had no luck.  I sent the dimensions of the hole to my mom who looked all over for a Tupperware or metal or some other bowl that would fit the hole.  No luck.  Finally, I realized that it wasn’t going to be as easy as placing something inside the existing space and that I was either going to have to attach something underneath or change the shape of the hole, which led me to googling images of play kitchens that people had built.

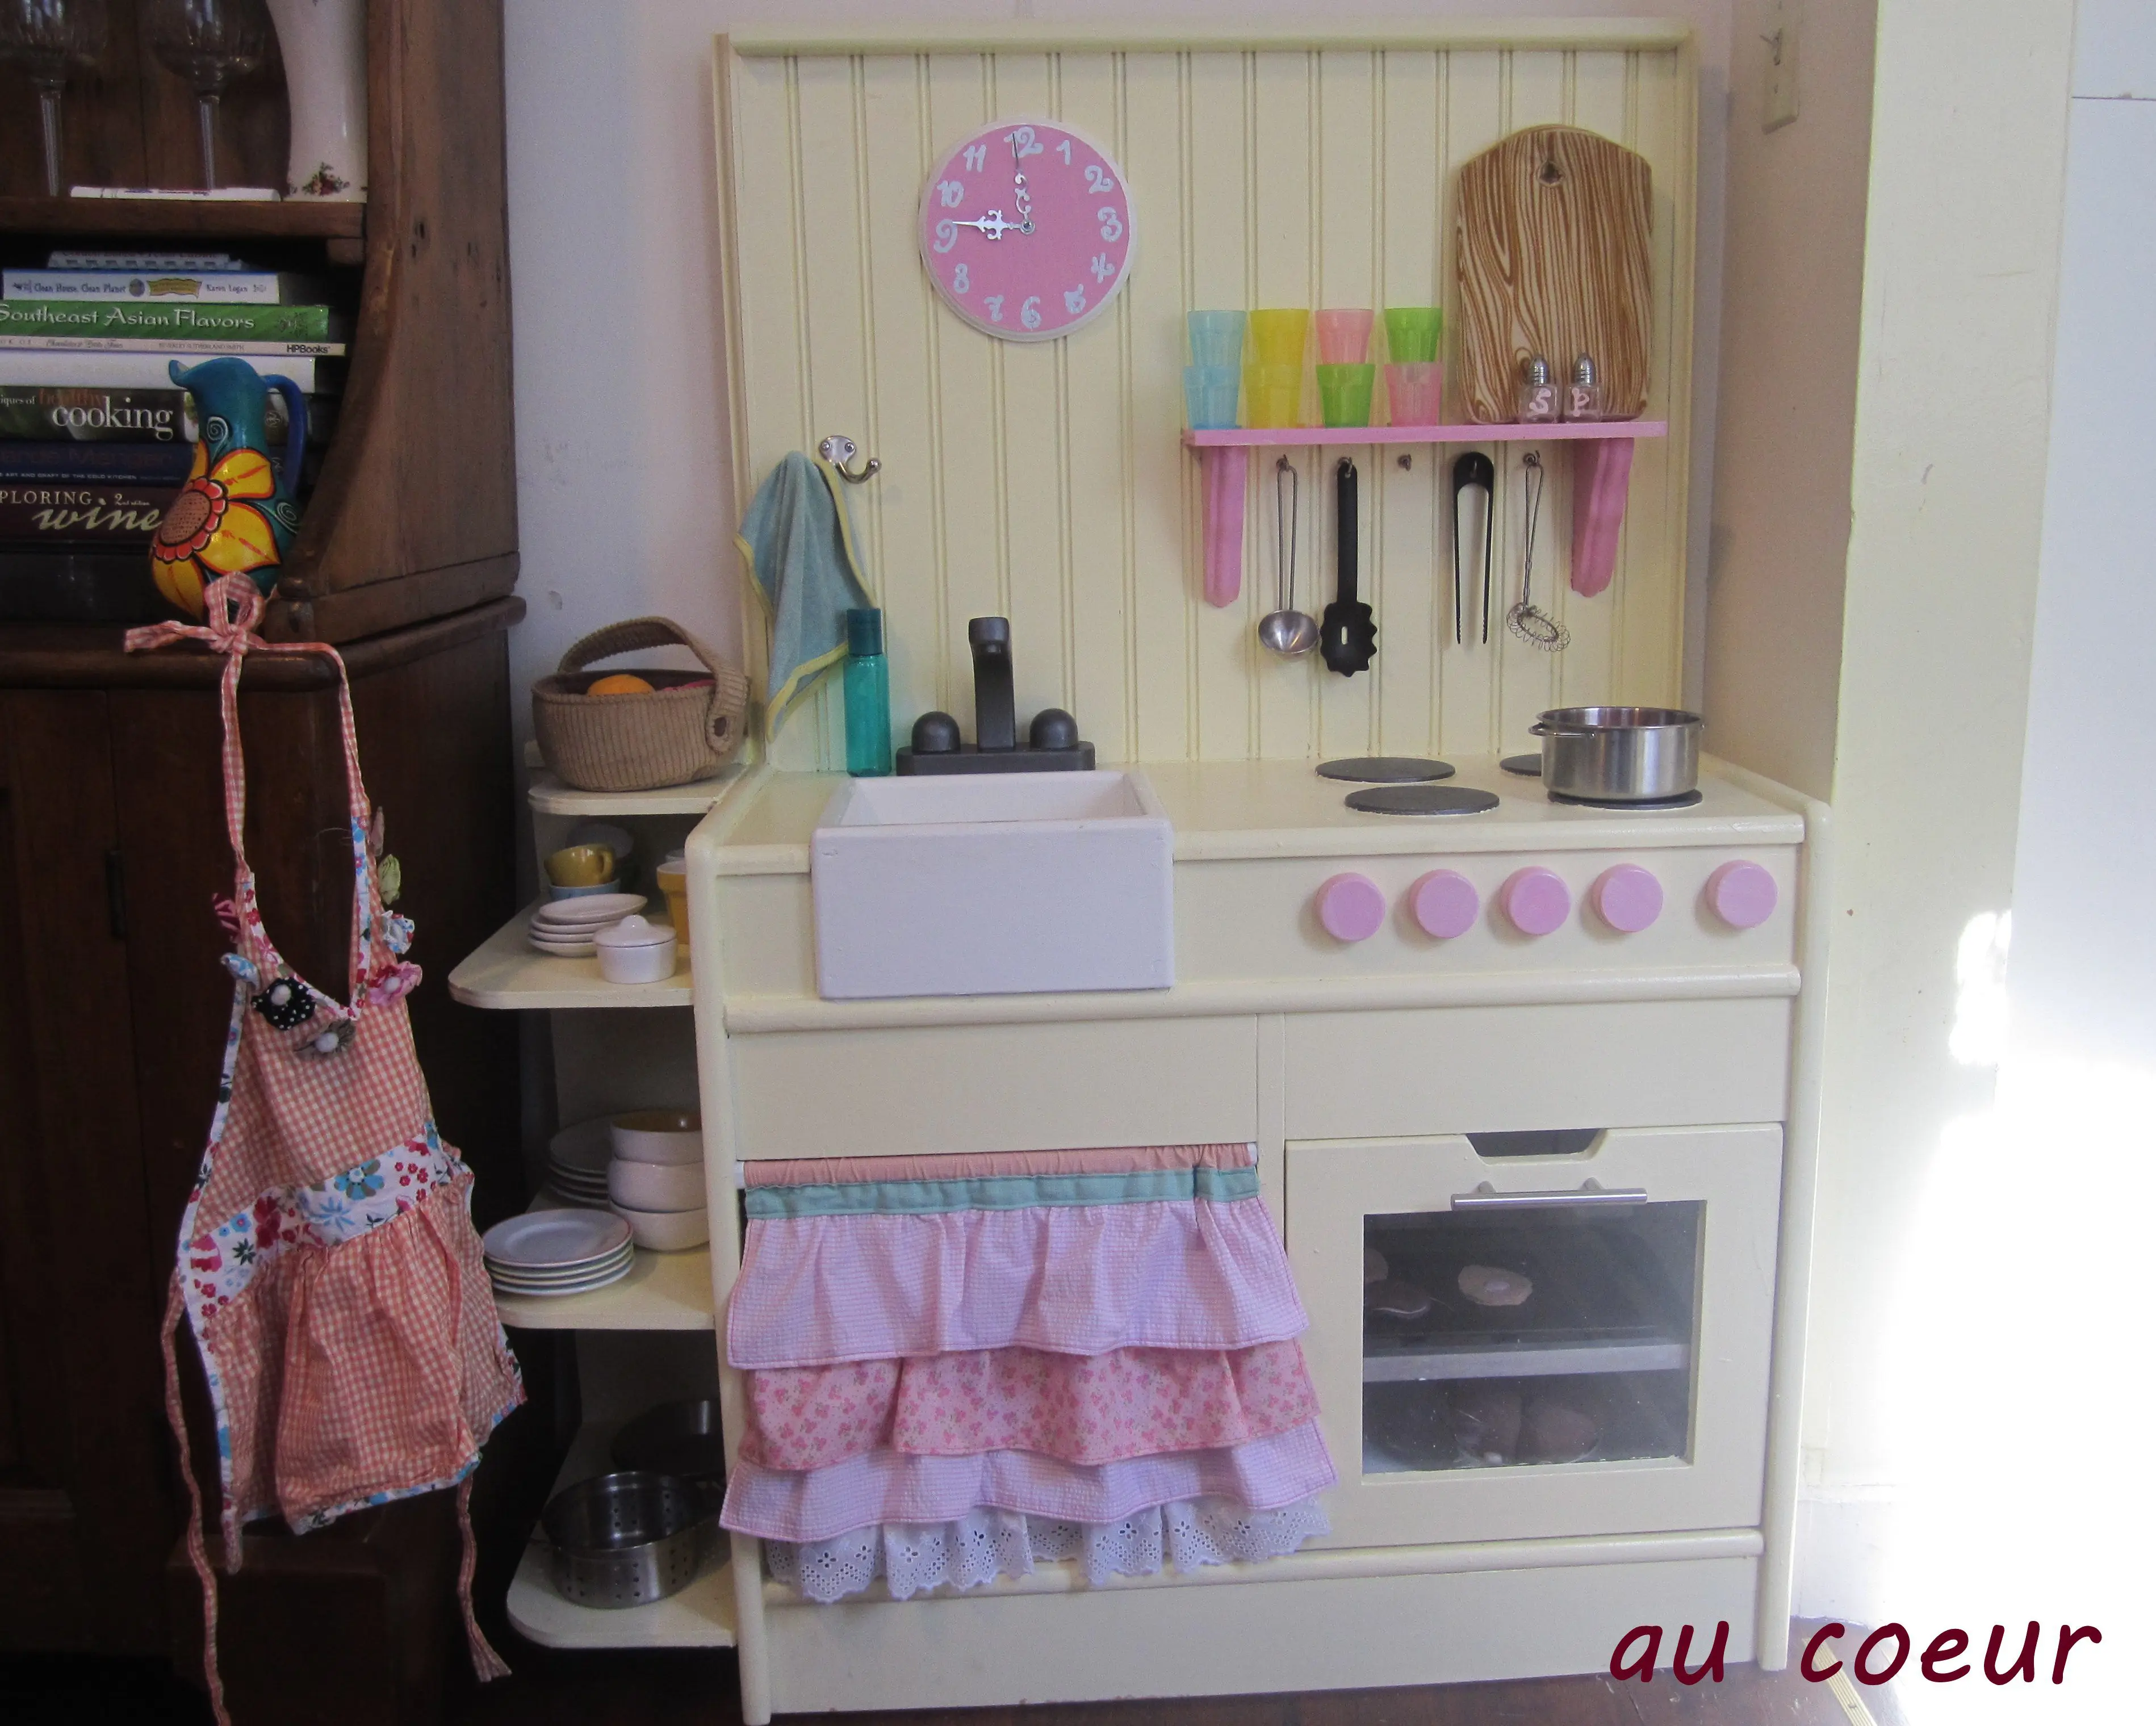
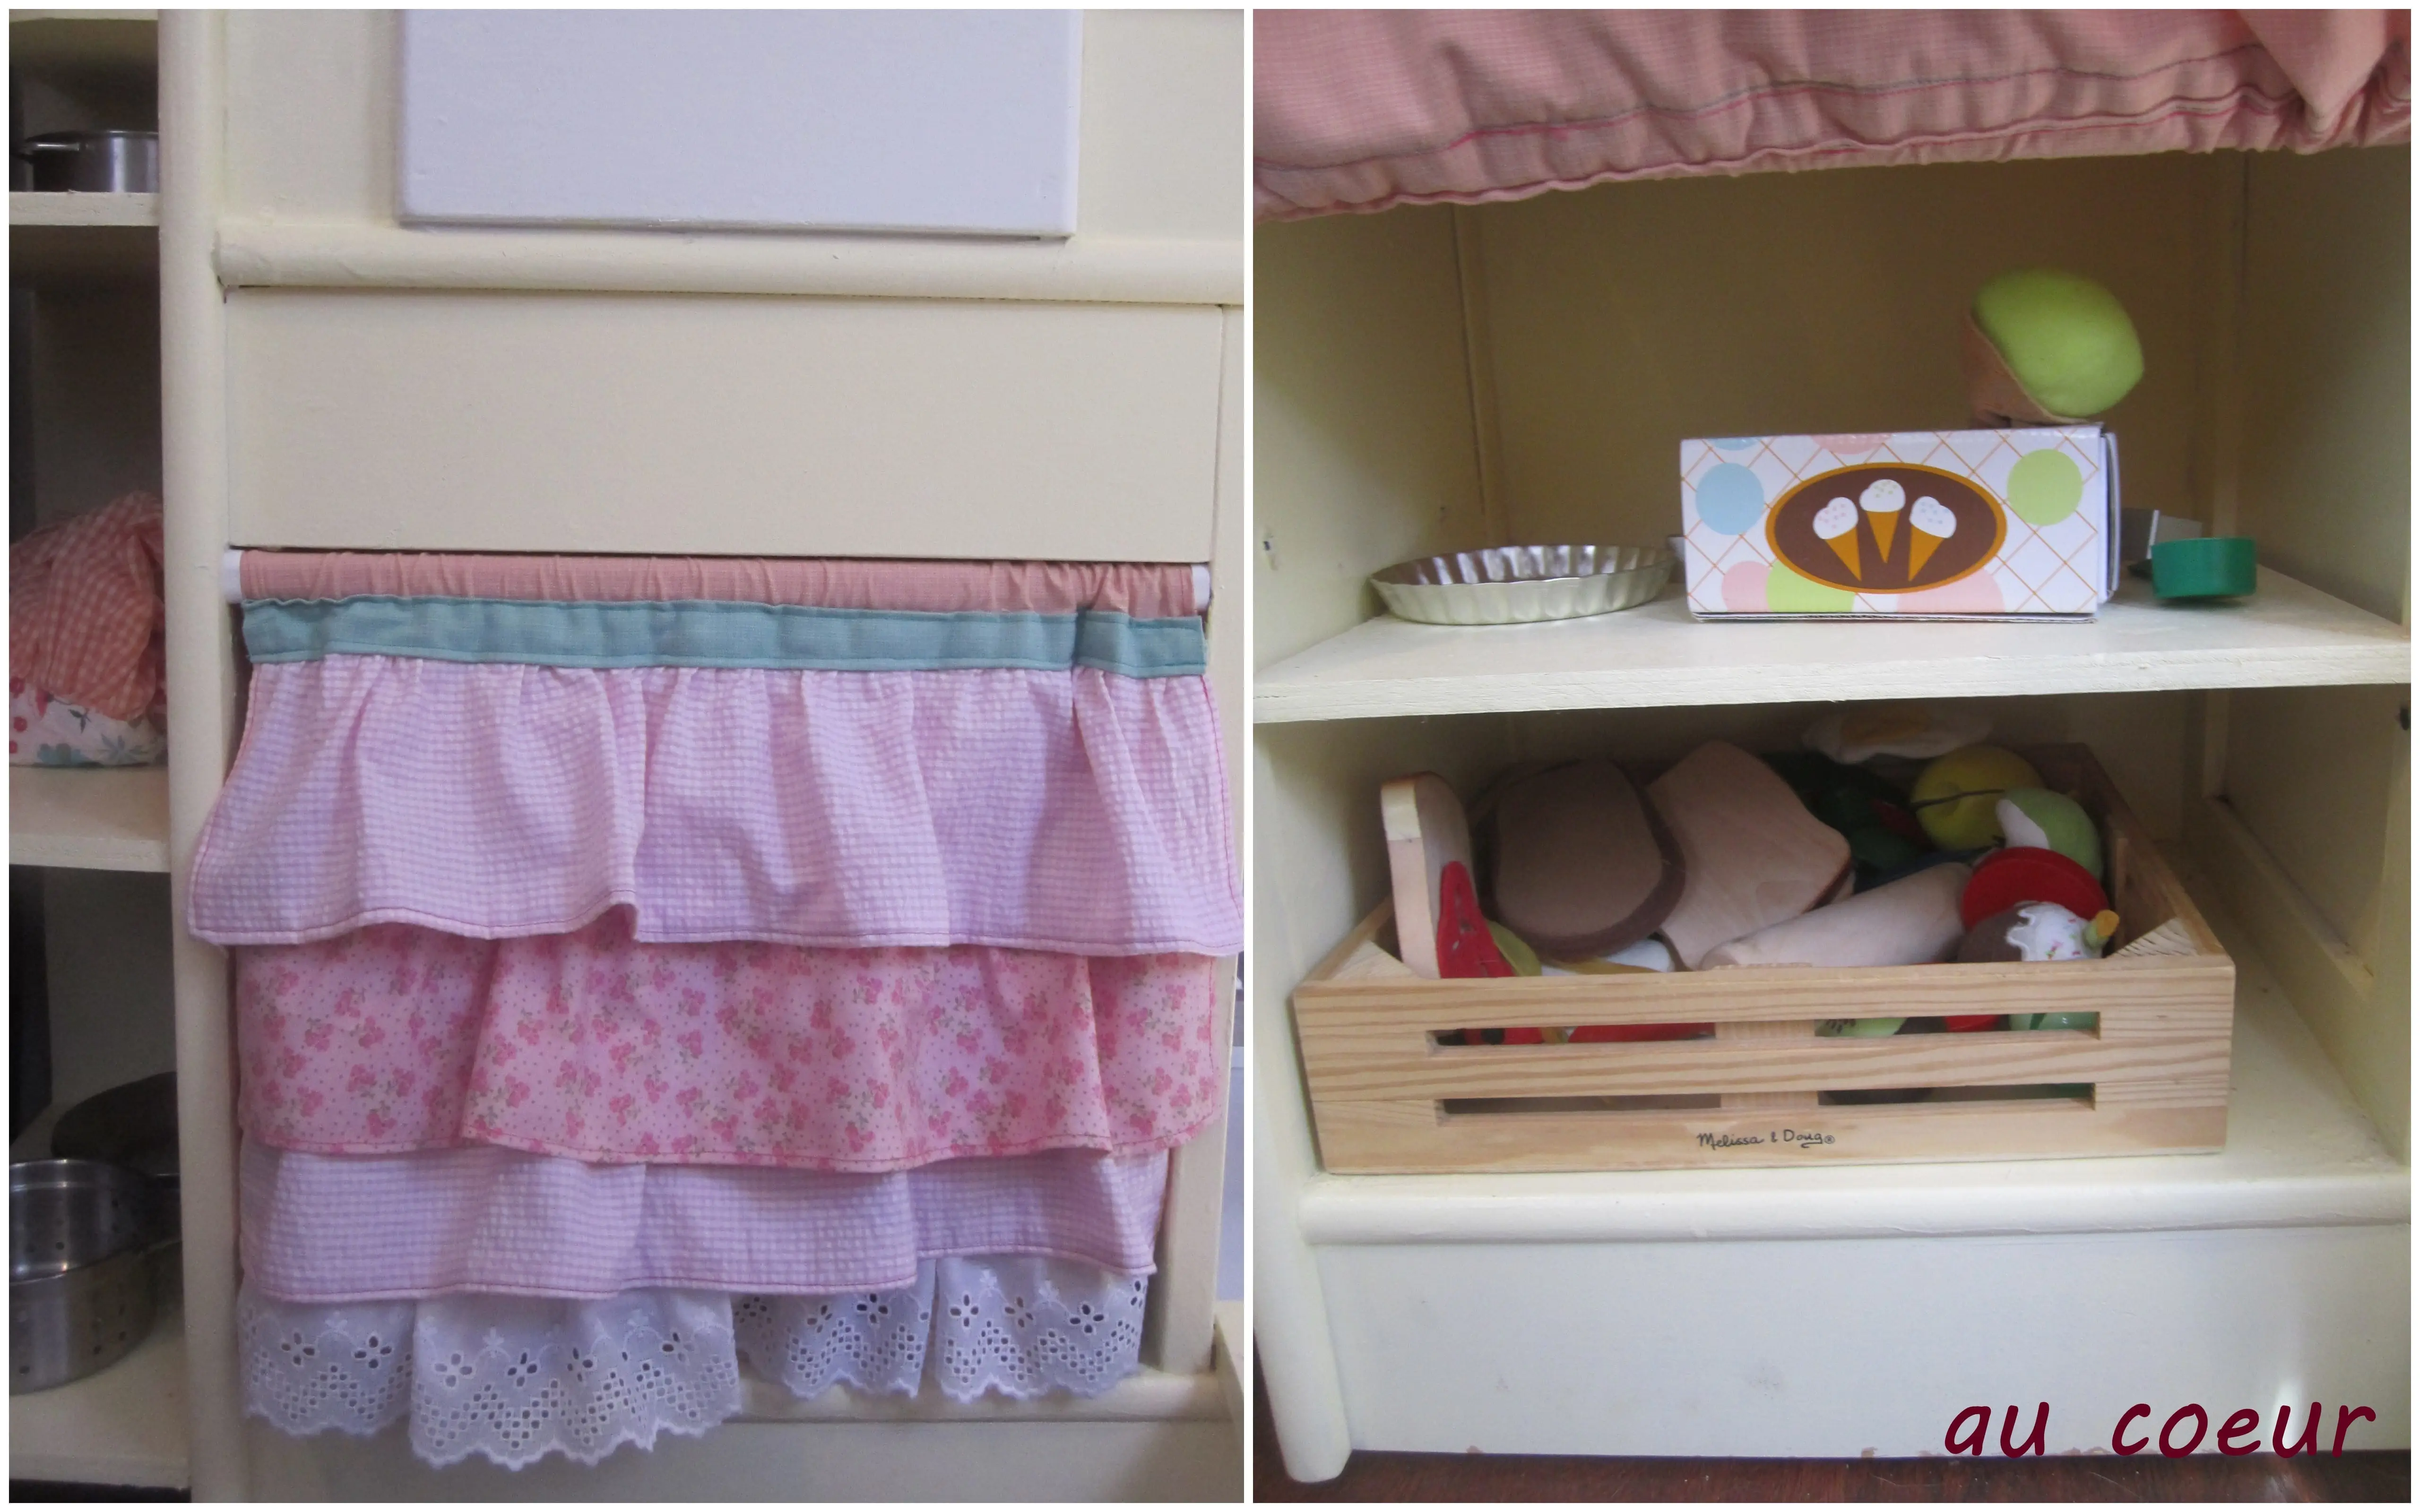
There are some really, really amazing play kitchens out there.  But the second I saw this one, with an apron front sink, I knew that’s what I wanted to do.  And not only did I want to fix the sink problem, I also wanted to add storage space and decorations to make it more country/vintage looking.  I drew a picture, and I talked to my friend Tiago, who is a carpenter, to see if he could help me cut the wood.  I posted a “wanted” on the REX for scrap wood and, when I had found enough, we planned for an afternoon of carpentry.  I figured we would get everything cut and then I would figure out how to put it all together later.
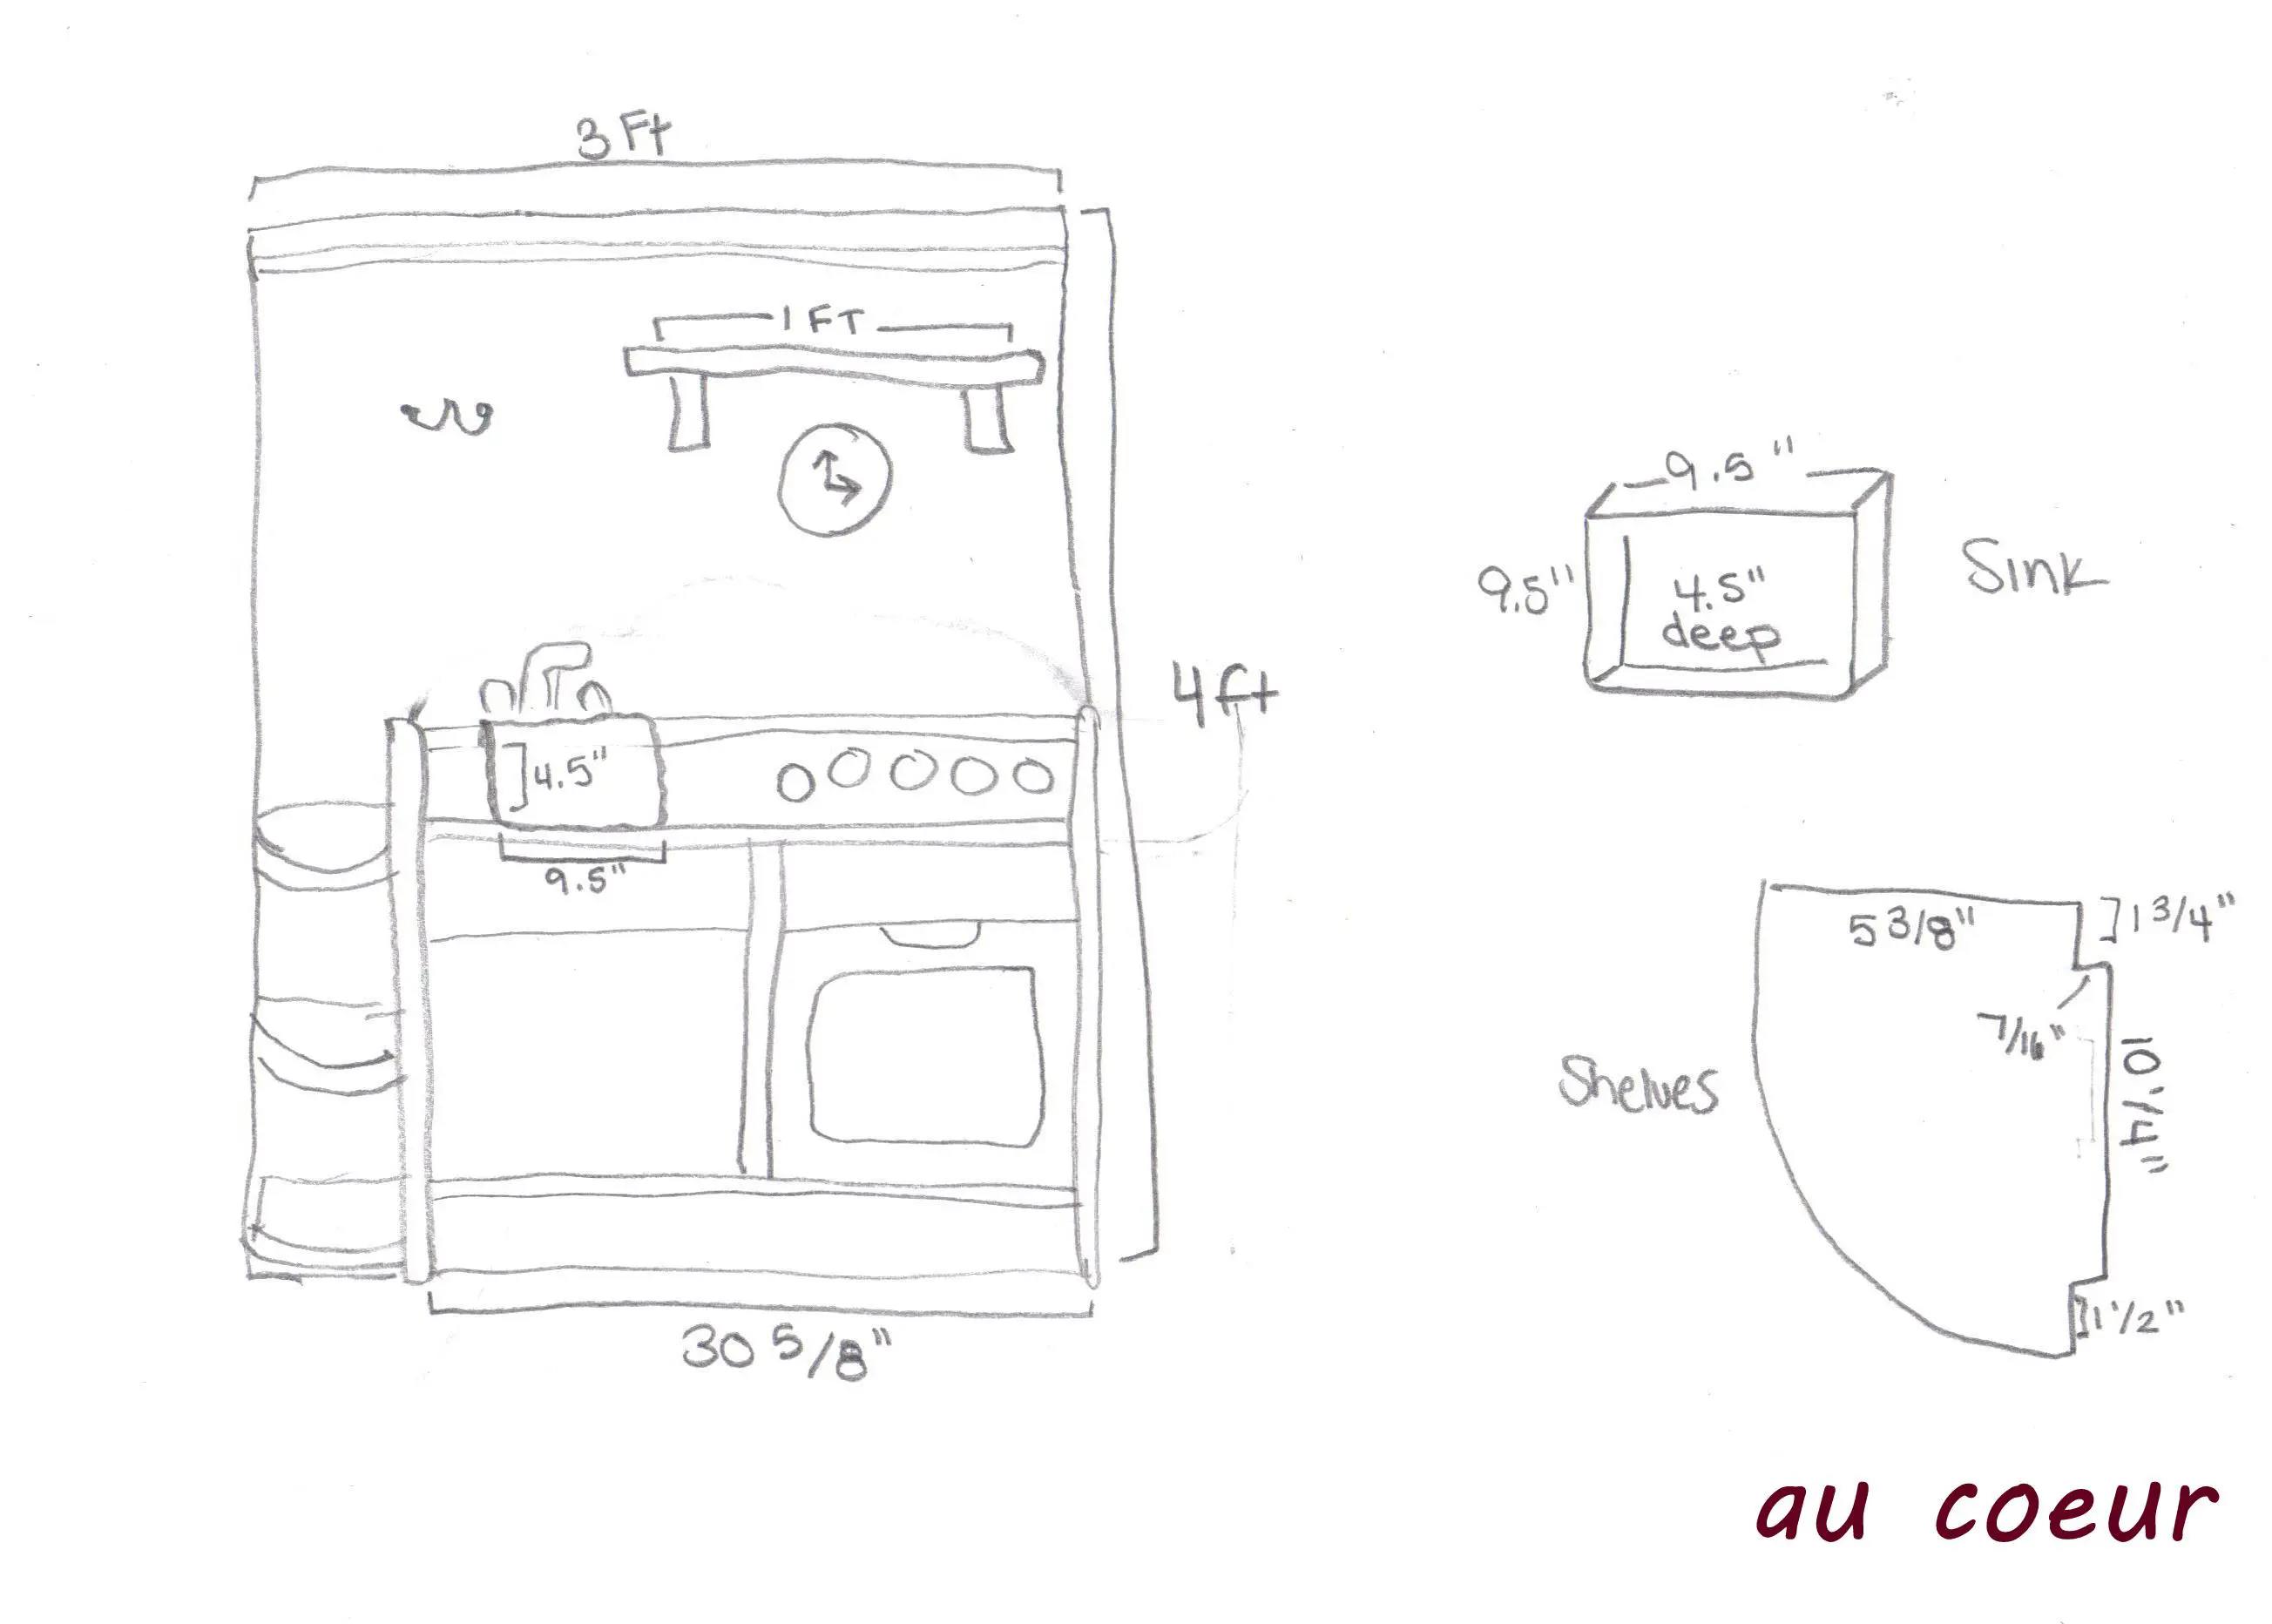
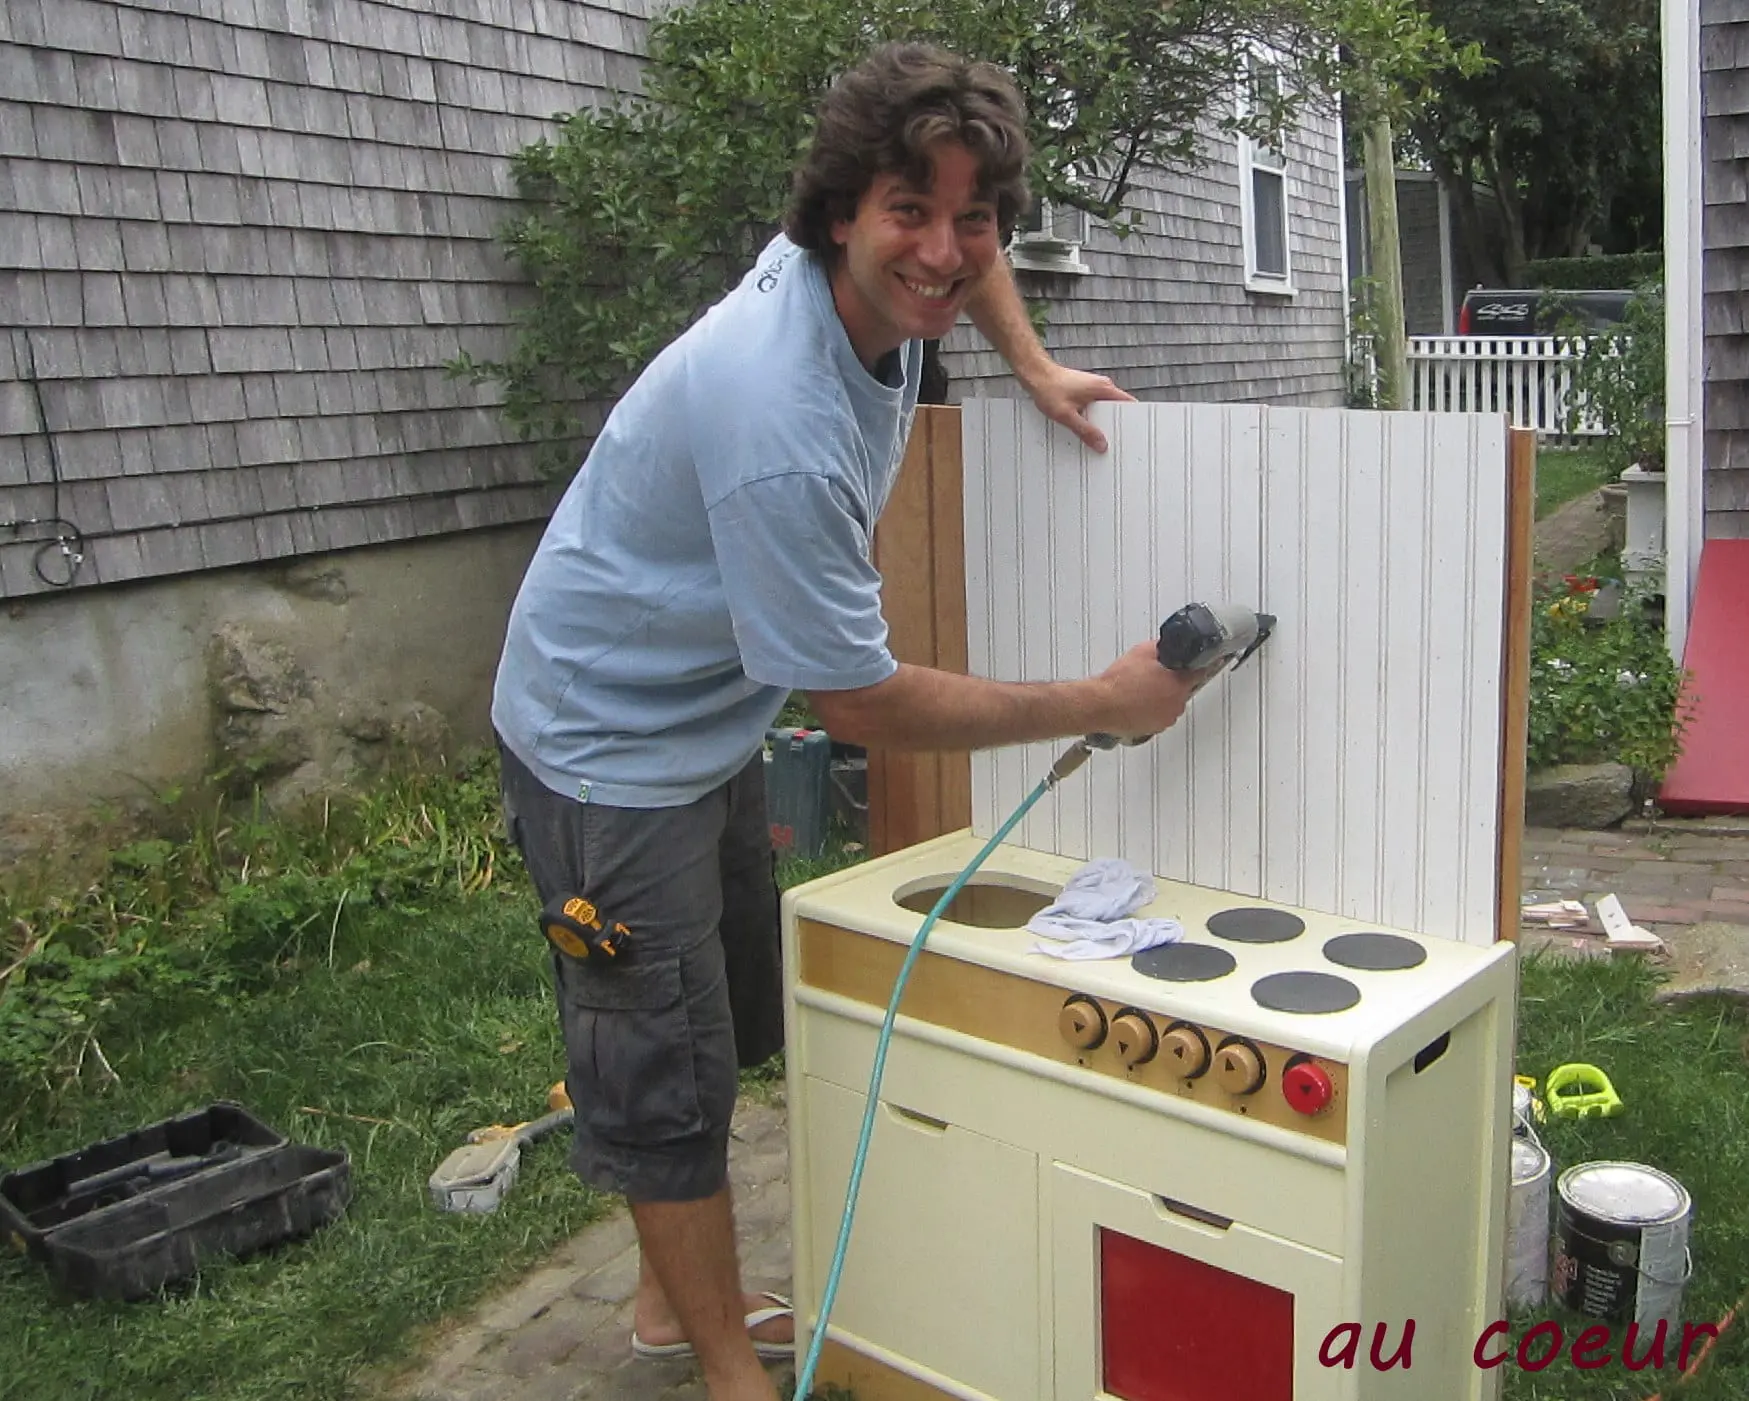
Tiago was amazing.  Not only did he cut everything, but he also put the entire thing together perfectly.  He measured and remeasured, did all kinds of fancy things like adding shims and using finishing nails — things that I never would have been able to do, certainly not as quickly.  He managed to make two small pieces of bead board look like one.  Tiago turned my simple sketch into reality:This play kitchen is a work of art; right down to the apron front sink.
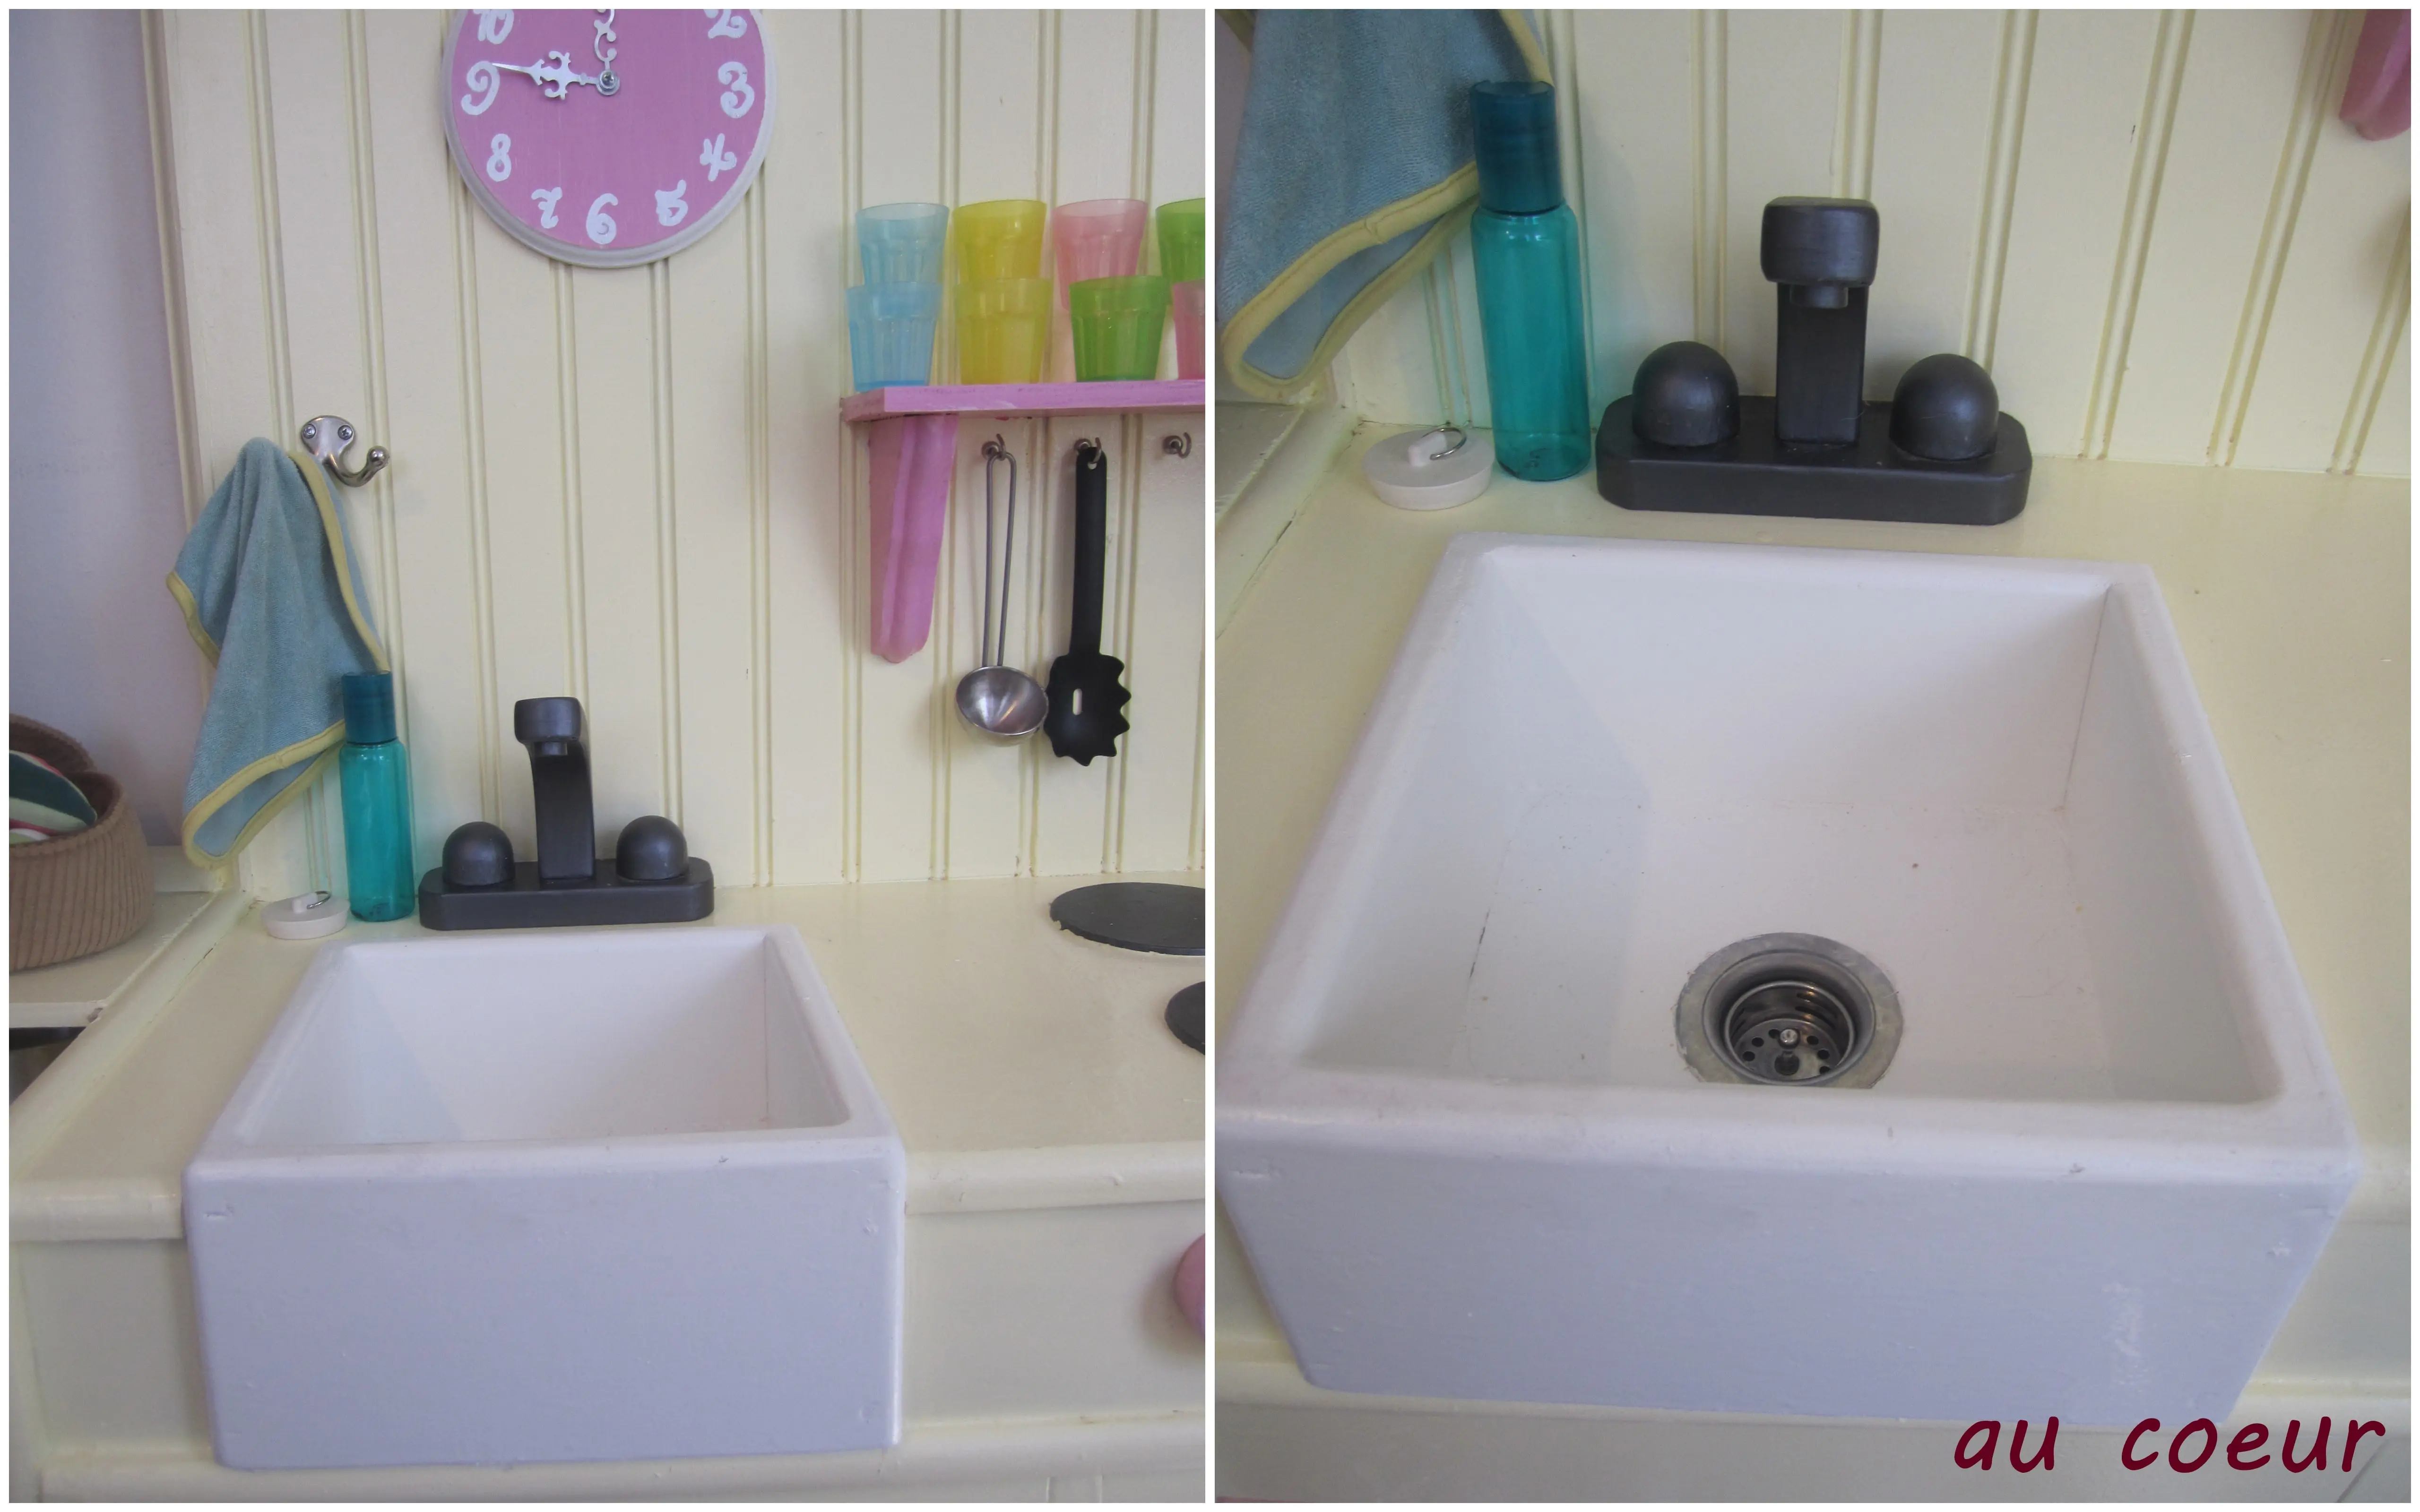
He built it out of a pine, assembled it with wooden pegs instead of nails, and then used a router to round all of the edges and corners.  The itty-bitty drain, strainer, and stopper, I found at Marine (our hardware store) for $14.

I am so incredibly proud of this gift we’re giving Nora and so, so thankful for the wonderful generosity of our friends and neighbors who made this possible.  Something like this would probably cost hundreds of dollars, but I spent much, much less.  Here are the details:  The play kitchen and all of the wood were given to me for free.

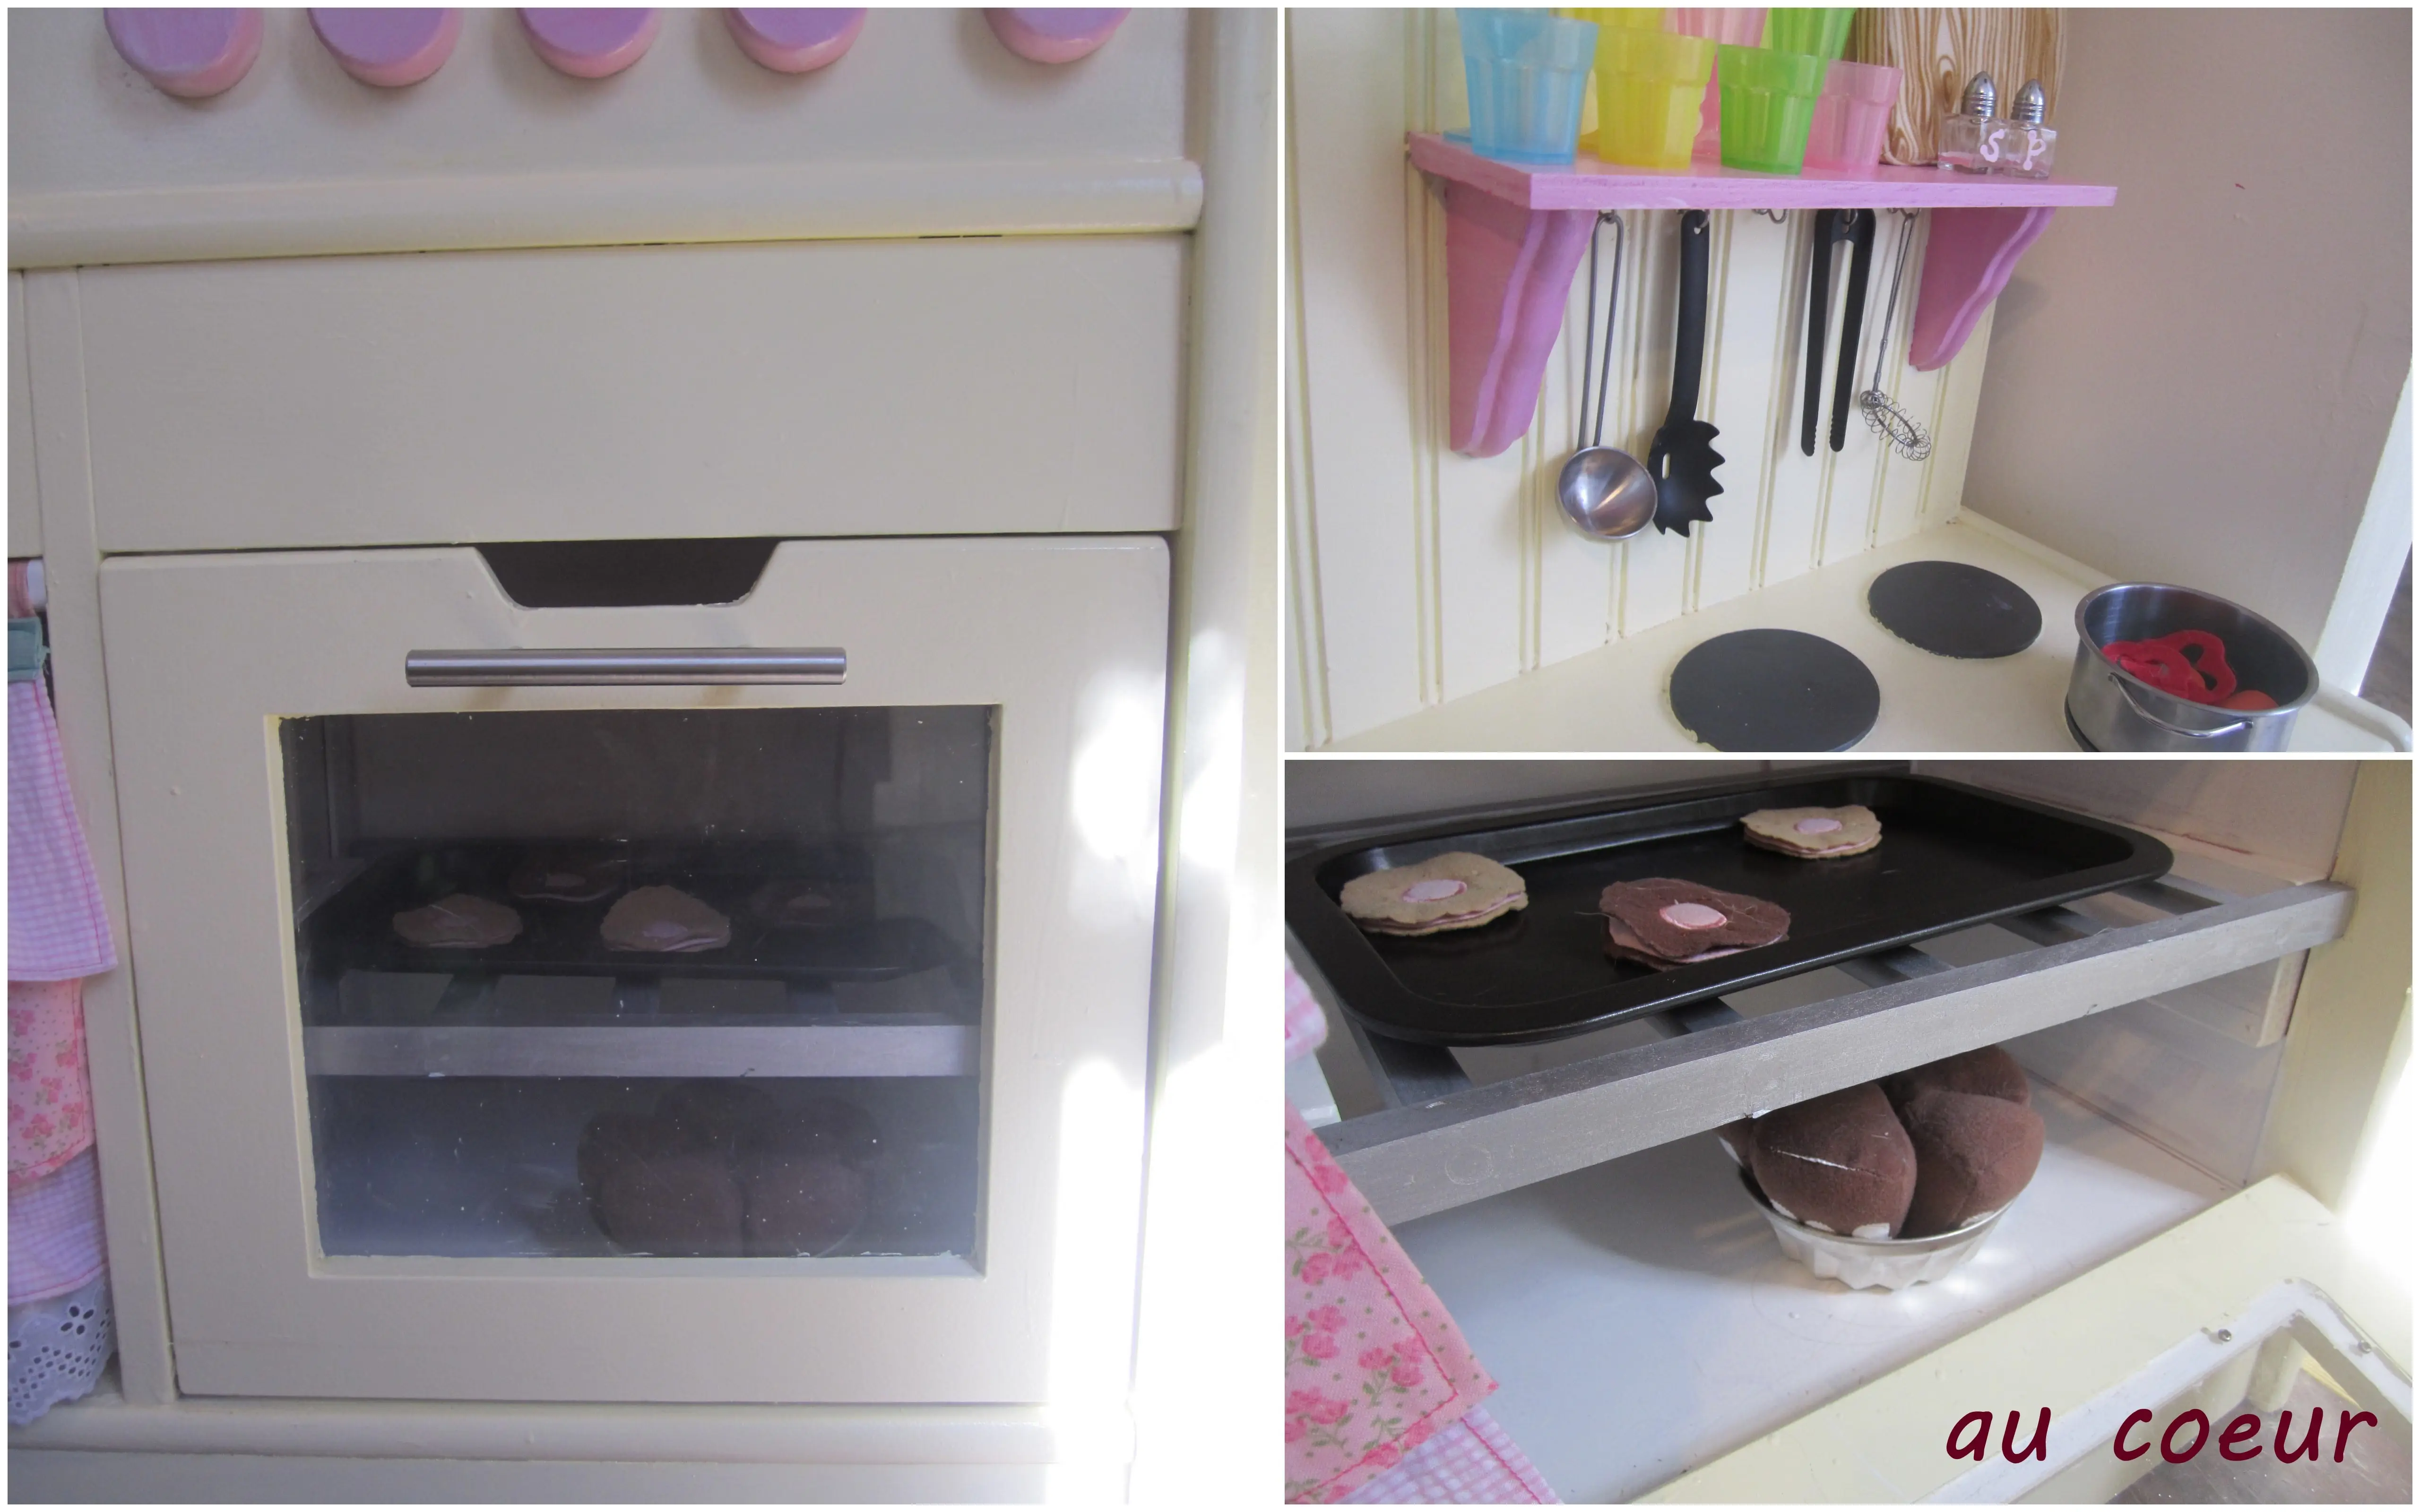
The oven rack is part of a bed side rail that someone gave me when we took the side off Nora’s crib.  It was too big because it was meant for a twin, so I cut it in half and saved the other half “just in case”.  I spray painted it silver, which cost $4.  All of the other paint we already had leftover from other things; I just bought a few painting supplies for under $10.  I bought the oven handle ($8), hooks ($7 total), corbels ($15), clock arms ($1.50), wooden circle ($5) and fabric (the most expensive part…about $20) for the curtain (details here).When it all came together, we built Nora a beautiful, one-of-a-kind, upcycled play kitchen for less than $75!
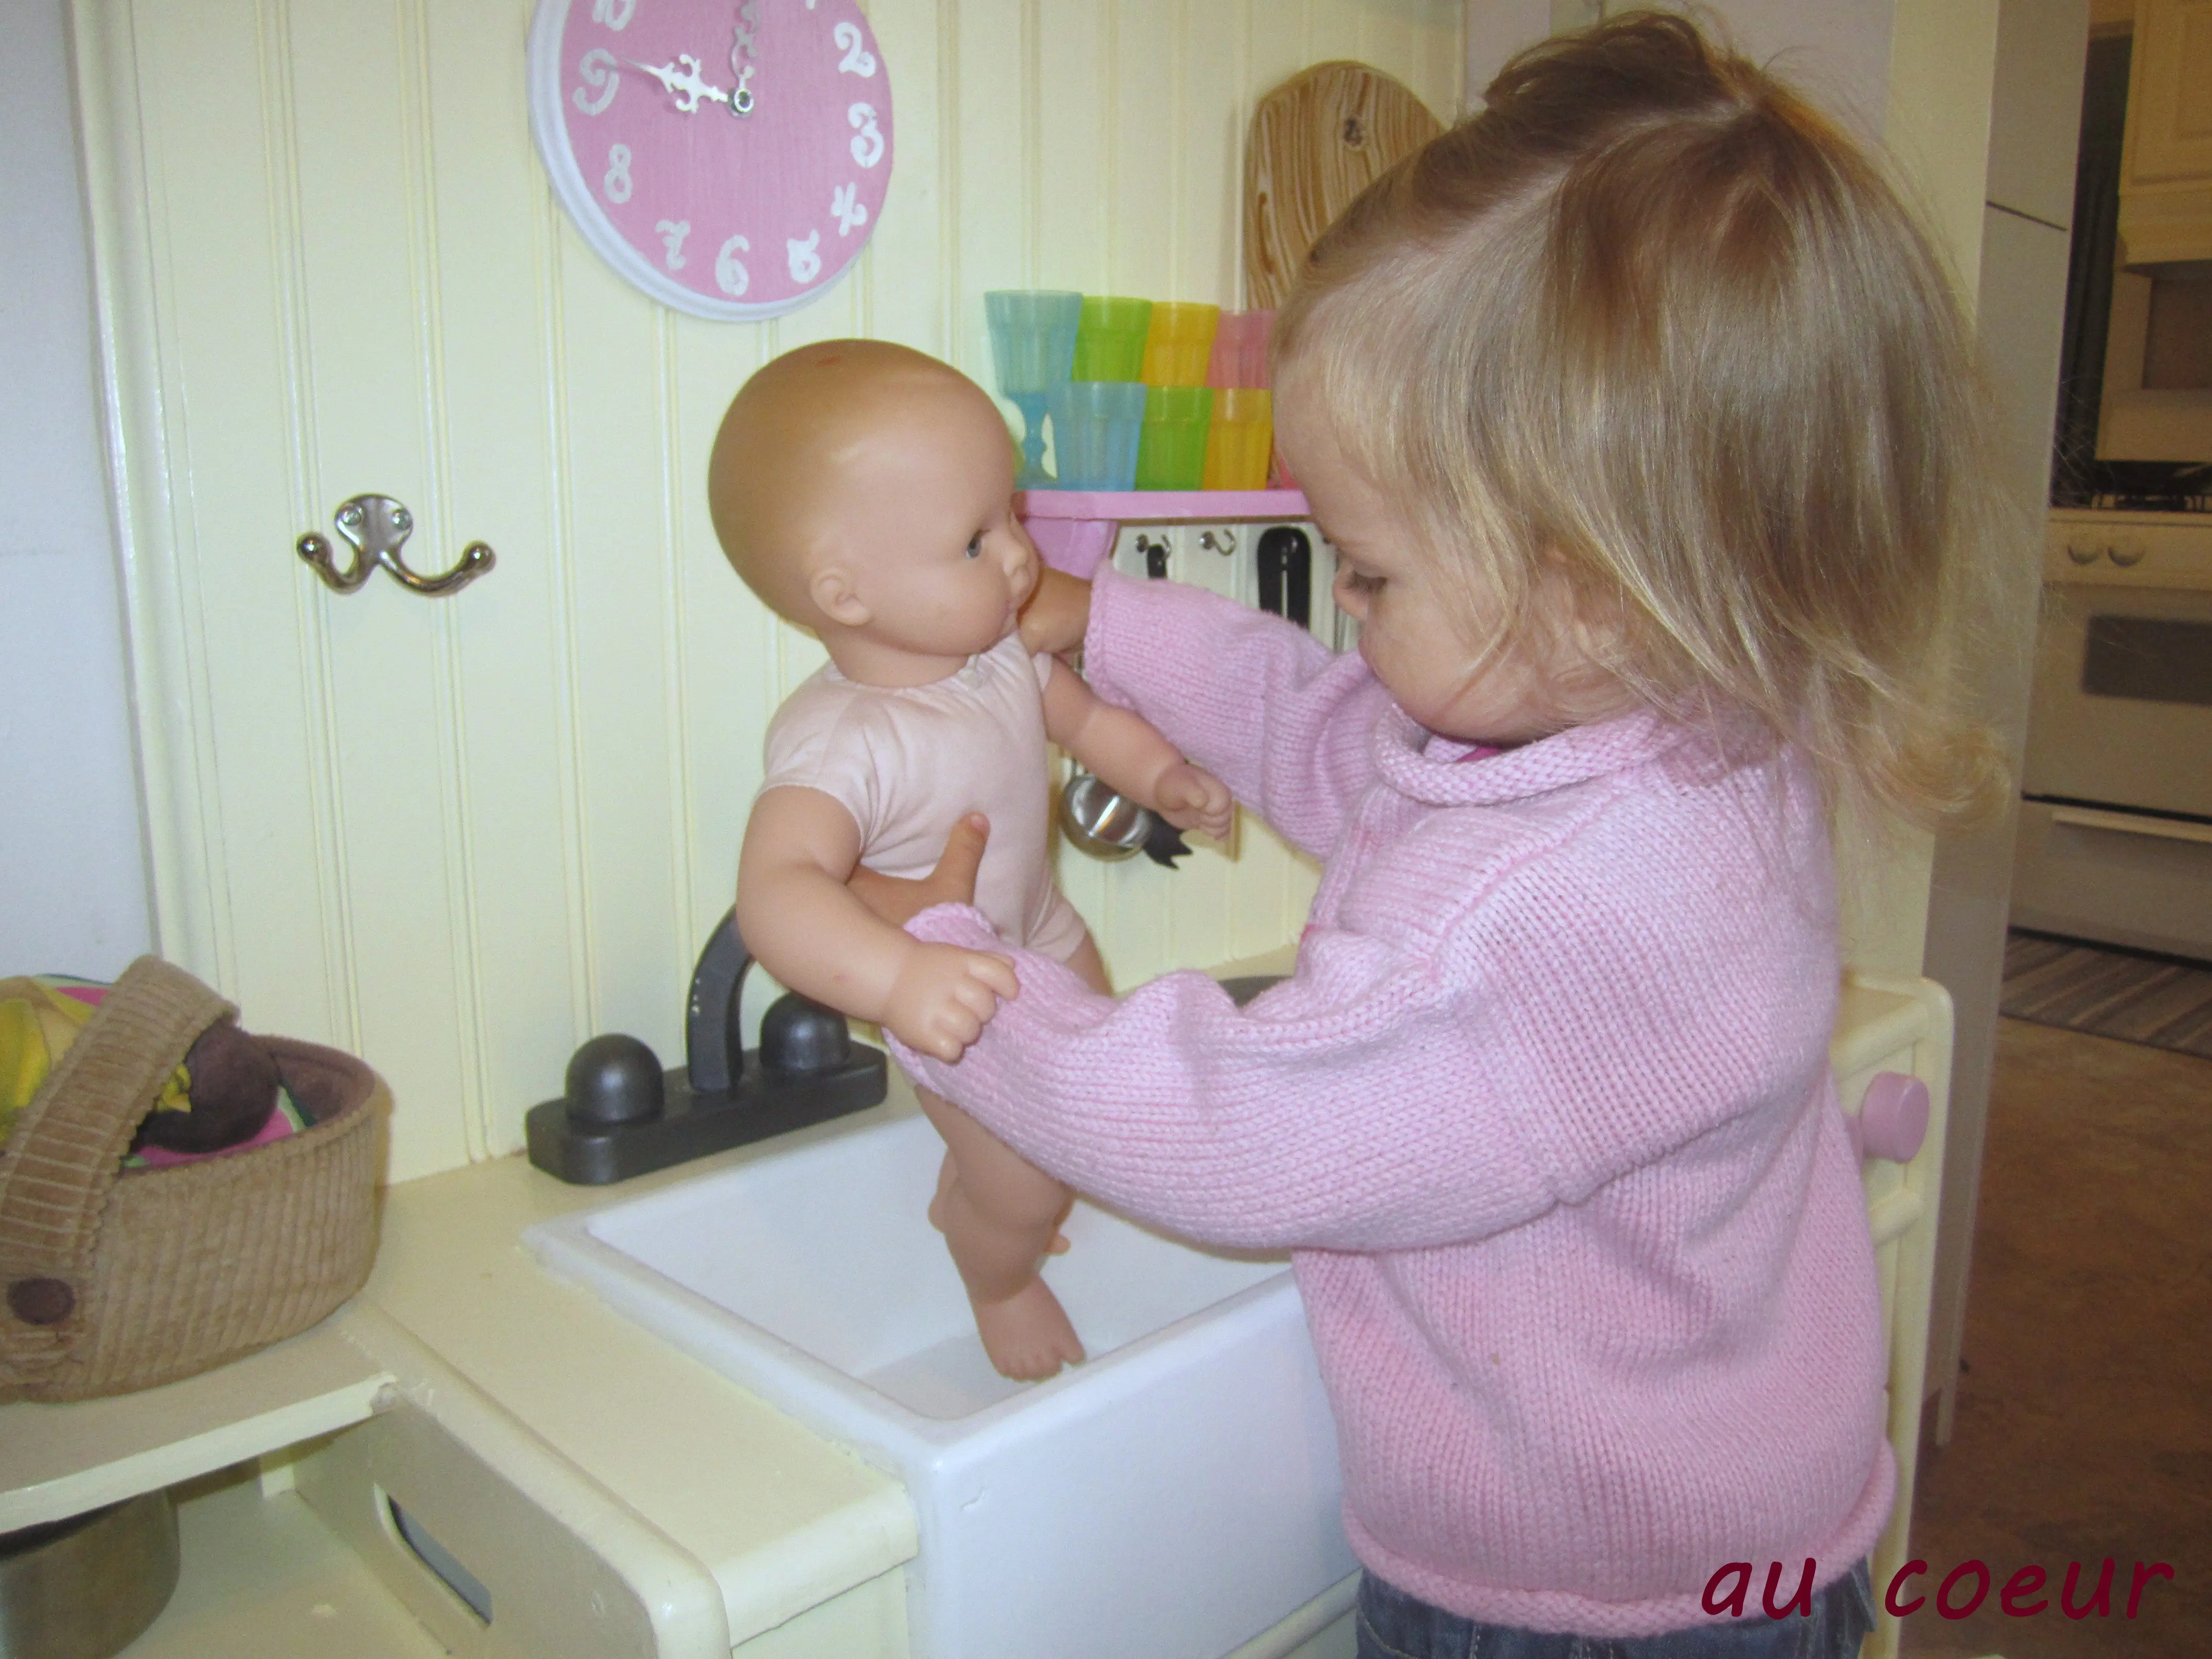
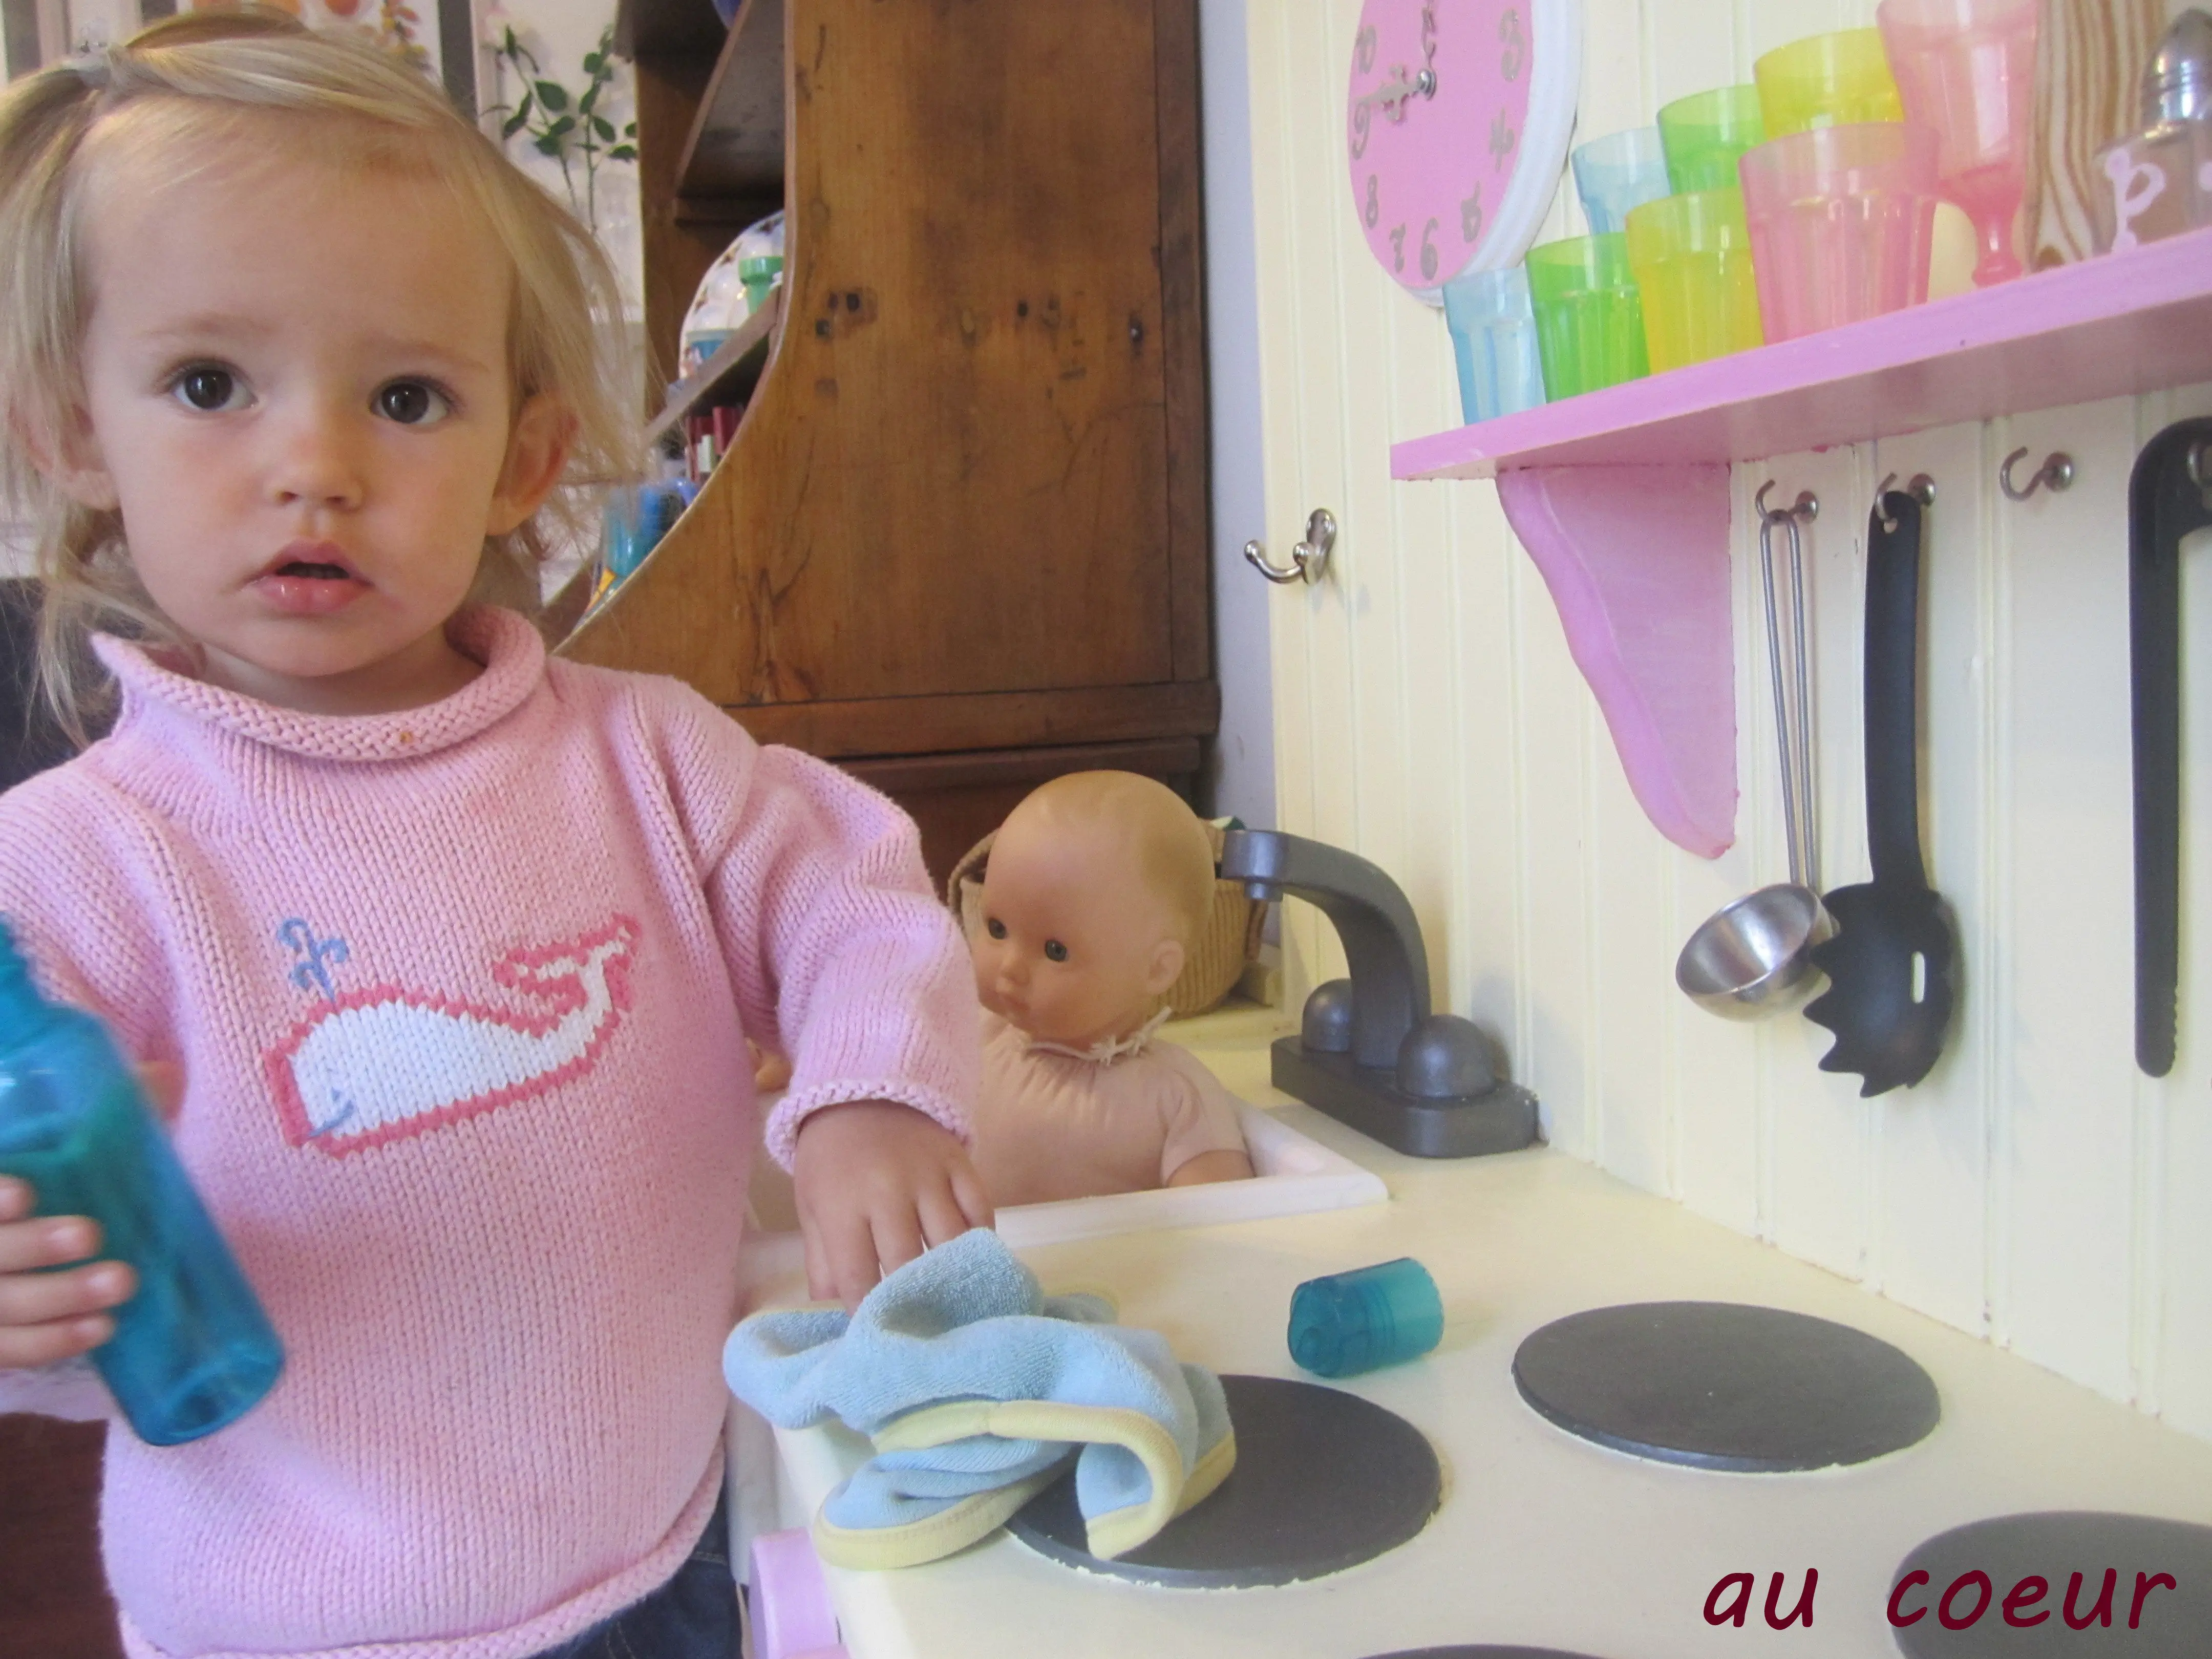
I couldn’t be more thrilled with how this turned out, and Nora is pretty excited too…Especially once she discovered that she could give Baby Lulu a bath in the sink!  I know Nora is going to get many good years out of this and, someday, I hope to see my grandchildren playing with it too.
 

⇗ Open full size image
0 of 0
TAGS:Play Kitchen
24 Comments
Share
  • Donna
    September 1, 2011

    BEAUTIFUL Amber!!!!! You are an amazing mother and Nora is a lucky little girl. You should be so proud of yourself! Have fun!!!

    Reply
  • Samantha
    September 1, 2011

    Amazing! You gave price breakdown…time?

    Reply
    • Amber
      Samantha
      September 1, 2011

      Well, it took a couple of months for me to track down all of the free wood and find time with Tiago to actually build it. That afternoon, he spent a little over three hours doing the initial work. I didn’t have the right wood for the sink, so he found that wood and built it at work (not sure how long it took), plus about 45 minutes to an hour for him to do final carpentry and for me to add details like the hooks, etc. Then there was painting (multiple coats)…all in all it is something that could be done in a day, but we did not. There were also a few things that took longer because of the fact that we were working with freebies instead of buying the right pieces (like having to piece together the bead board).

      Reply
  • kalina
    September 1, 2011

    I love it! I wanna play with it myself!

    Reply
  • Rachel Dowling
    September 1, 2011

    Oh, that is so, so lovely. Truly one of a kind. What a great idea to do the bead board backing, and the shelves. And Tiago did a beautiful job on the sink. And the sink skirt gives it a real flourish.

    Reply
  • Lovelorn Poets
    September 1, 2011

    Incredible and beautiful! It’s gorgeous to look at (and Nora’s pretty darn cute, too :-).

    Reply
  • Shari
    September 1, 2011

    The finished product is wonderful. Nora will love playing with it.

    I do have to comment that you did have a play kitchen – it was a Little Tykes with all of the necessary accessories. In fact the kitchen was in your bedroom. You and your brothers spent quite a bit of time playing with it.

    Reply
    • Amber
      Shari
      September 1, 2011

      Wow, I don’t remember that at all! All I remember was coveting those of my elementary school friends (remember Amanda Farley’s?). Thanks for the correction, Mom. It must have been sold/gotten rid of when we moved out of the Berry Drive house?

      Reply
      • Shari
        Amber
        September 2, 2011

        No you had it at the Norwood House. Your bedroom was much smaller at the Norwood House. After awhile the American Girl dolls and their things took over your bedroom. The kitchen moved to the family room downstairs. I probably sold it before we moved into Tanager, since you were in middle school by then. I have photos of you and Brandon playing with your pink tea set on the kitchen peninsula. He has the white wicker rocker pulled up to the end and you are serving him tea. The pink tea set is out in our garage in one of your plastic tubs. I am saving it for Nora to play with when you, Chris, and Nora come to visit.

        Reply
  • Shae
    November 11, 2012

    Hi! I found this blog post through Pinterest. I recently bought the same kitchen set for my daughter off of Craigslist and I’m planning on sprucing it up a bit before giving it to her as a Christmas present. I was just wondering what kind of paint you used on yours. I noticed that the kitchen set has a bit of a glossy appearance. I’m really, really hoping I don’t have to sand before painting! How is yours holding up? Thanks!

    Reply
    • Amber
      Shae
      November 18, 2012

      Hi Shae,

      To be honest, I’m not sure what the paint was that I used — it was a leftover can from when our landlord painted the kitchen. I know it wasn’t low-VOC or anything special like I might have purchased if I wasn’t trying to keep the expenditures so low. I might have roughed it up slightly by hand with sandpaper (can’t remember) but I definitely didn’t do any extensive sanding. It got 2-3 coats of the paint and plenty of time to cure before she played with it, and a year and a half later we haven’t had any chipping, peeling or dings. Hope that helps, good luck with your kitchen!

      Reply
      • Shae
        Amber
        November 20, 2012

        Thanks! Yours is so adorable!

        Reply
  • Lucy N.
    September 1, 2013

    Soooo cute! Did you use a brush or spray machine to paint this? Also did you have to remove the knobs and doors to paints? Thanks!!

    Reply
    • Amber
      Lucy N.
      September 1, 2013

      Lucy,

      I removed the faucet and knobs to paint. The oven door can’t be removed, so it stayed on. The paint was rolled on with a brush used in the corners/edges.

      Reply
      • Lucy N.
        Amber
        September 1, 2013

        Thank you for taking the time to respond! I forgot to ask if you used primer? We found the same kitchen as you and I am a little nervous to attempt my remodel. This would be my first major project and I don’t want to mess up 🙂 You guys did such a great job!

        Reply
        • Amber
          Lucy N.
          September 1, 2013

          Nope, no primer. We were going cheap and just using leftover paint. I didn’t sand either, and 2 years later it still looks as good as the day I painted it.

          Reply
          • Lucy N.
            Amber
            September 1, 2013

            Music to my ears!! Thanks again 🙂

  • Ellen
    October 4, 2014

    This is really cute! I have the same kitchen that I got at a garage sale and have never liked the red in my turquoise play room. Did you just paint while it was still put together or did you have to disassemble it first? Also, what the heck brand is it?? I’m trying to buy the fridge that goes with it but can’t find the name to even search for it. Great work!

    Reply
    • Amber
      Ellen
      October 8, 2014

      Hi Ellen, I painted it without taking it the main structure apart, but did remove the knobs and faucet. The inside was tricky to pain assembled, but the outside turned out great.

      I don’t remember anymore what brand it is, but I do remember that I did a Google image search and eventually figured it out. Good luck!

      Reply
    • Amanda
      Ellen
      December 22, 2014

      I just came across the brand name while searching for other pieces – it’s called ‘Plan Toys Kitchen’. HTH!

      Reply
      • Amber
        Amanda
        December 25, 2014

        Actually, I just looked in my email history. My kitchen is made by Pin Toys. It was manufactured with the window in it. http://www.pintoys.com/catalog/subcategory/7-Role-Play/#05559-SINK-AND-STOVE

        Reply
  • Amanda
    December 16, 2014

    Hi Amber, I have the same response as previous posters. Purchased the same kitchen at a garage sale – it’s been sitting in my garage for months – going to give it a makeover for my girls Christmas present – yours turned out beautiful! My question: What did you use for the clear panel on the oven door? Plexiglass? Did you just glue it into the inside?
    Thanks!

    Reply
    • Amber
      Amanda
      December 20, 2014

      Hi Amanda, the kitchen I started with already had the oven window. It is screwed in and I’m guessing it is plexi-glass? Whatever it is is very sturdy, because my girls regularly stand on it.

      Reply
      • Amanda
        Amber
        December 21, 2014

        Ah, darn. Mine is painted wood – must have been a modification by the previous owner. I’ll screw in a piece of plexi and see how long that lasts. 😉 Thanks for your response! …Back to the cold shop for more painting….

        Reply

Leave a Comment Cancel Comment

Recipe Rating


Previous Post
Wordless Wednesday: I Want to Ride My…
Next Post
It’s Here!!!

Life Right Now

aucoeur

View

Jul 16

9 1
Open
Z was Raja in an Aladdin production through her dance studio @pasgeorgetown this evening and she did such a great job. I loved watching her. She took a year off dance and is getting back into it and you'd barely know she took any time off, plus she had a big smile on her face the whole time - I could tell she was having a ton of fun. ♥️

aucoeur

View

May 29

15 0
Open
What happens when you go on a long weekend trip with only your husband, no kids, and no agenda? 

Lots of walking, cocktails in the middle of the day, singing at a piano bar, and time to write a blog post for the first time in nearly two years. Which I did! 

😮 For real. LOL 😊

Read it at https://amberhinds.com/2022/05/celebrating-15-years/

aucoeur

View

May 28

29 4
Open
Today Chris and I have been married for 15 years. We're celebrating with our first weekend away from children while my mom watches all four girls. We rented an old Victorian from the 1800s near the coast in Galveston, Texas and spent the day at a spa, eating delicious food, walking the beach under the stars, and finished the night with a bottle of bourbon saved from when we lived on Nantucket. I'm not sure I could have asked for a much better day. I even had an oppotunity to get out the lightship basket purse Chris gave me for our 5th anniversary. ♥️

aucoeur

View

Apr 2

6 0
Open
Multitasking between performances at this weekend's dance competition.

Image Alt: open laptop showing the Equalize Digital Accessibility Checker website in the foreground and an empty stage in a crowded auditorium.

aucoeur

View

Mar 13

12 1
Open
We had a cold snap and yesterday we had to get all bundled up for Zara's soccer game. It was 30 degrees and, despite these pictures, Vivi's patience for being out there did not last long. Tomorrow it's supposed to be 80 degrees and we're really looking forward to warmth again.

By the way, my awesome gaiter came from our client @isacattostudio. Isa paints patterns and makes really beautiful textiles and notebooks with her patterns. ♥️ her work and team.
  • Start Reading
  • Explore Topics
  • Get in Touch
  • Subscribe

COPYRIGHT © 2020 AMBER HINDS. ALL RIGHTS RESERVED. Site Powered by Pix & Hue.