
It’s officially been a year since I arrived in Texas. When we decided to list our house for sale during our spontaneous cross-country move, I somehow managed to talk Chris into taking a gamble on a full renovation and trying to “flip” our house.
For a while now, the Fort Collins real estate market has been a seller’s market; we knew that we would walk away from our house with cash in our pocket, no matter what, but when we moved last year, I wanted to take advantage of the seller’s market and try to maximize our returns.
The more money we had in profits from the sale of our house, the lower mortgage payment we could have on future housing in Texas. So we decided to invest in the house so we could sell it for more than we might otherwise.
I thought it might be interesting to share some details about what I did to the house and how it turned out, {spoiler alert} really well, in case anyone else is thinking about trying to flip their own house.
Tldr;
We bought our house in Fort Collins, Colorado in October 2015 for $289,000. It was a four bedroom, two bath 2,138 sqft. bi-level on 0.29 acres, that was built in 1971. It had been relatively well maintained and was generally updated sometime in the late 90’s, but not since.
We sold our house in January 2018 for $378,000 – $89,000 over what we had purchased it for 2 years and 3 months earlier.
We did zero improvements (only maintenance) during the months that we lived in our house, mostly because we didn’t have the cash flow to comfortably spend money on renovations and didn’t want to undertake debt to do so. Thus, everything that led to our $89,000 increase in value was done in 4-6 weeks prior to listing for sale. Read on for more details…
Before Renovation Value & Status
On the first walkthrough, our realtor recommended listing the house for around $305k – with only very minor tweaks (mainly, patching two holes in our laundry room ceiling from a prior plumbing mishap the floor above). At that point, the payoff amount on our mortgage was just over $273k.
Listing at $305k would have netted us around $10,000 after closing costs and realtor’s fees (if we got our asking price). This was more we had put into the house when we bought it (we had an FHA loan and had only put down around 2%), so these numbers could have been considered a “winning” scenario (unlike our house in Wyoming, which we actually paid $4,000 to get out of).
Main concerns we had with listing our house were:
- It backed up to a busy road – this had bothered me initially, and though I got over it, I knew it would also bother others.
- As a bi-level, the house didn’t have a master bathroom.
- The outside appearance was not especially great: the vinyl siding was super faded and it had sort of a barn thing going with the shutters.
- The inside needed desperately to be updated, everywhere from carpeting and paint, to the kitchen, bathrooms, and family room.
- The furnace was beyond its expected lifespan and needed to be replaced – it was 20+ years old!
Updates could all be made to the house, but there was no changing the location or adding a master bath (unless you were to do a major addition and add a master suite over the garage). We were concerned that in its current state, we would have a hard time getting good offers or anything near asking, especially given the time of year – Thanksgiving – when we would be going on the market.
Not getting a good offer could have meant walking away without enough cash to put a down payment on a house in Texas.
With all this in mind, we decided that the best course of action was to put money into changing fixable cosmetic issues in hopes of eliminating any reasons buyers might have had for making low-ball offers below asking price. Our goal was to walk away with as much profit as possible, which meant pre-eliminating as many objections to the house or price before buyers could even make them.
Below is a look at what we did: the changes we made and how we prioritized our budget, plus a deep-dive into all the costs.
First: Goals and Renovation Budget
When Chris and I bought the house, we had plans to update it when possible. Though that had not happened, we had spent plenty of time fantasizing, so I already had a pretty good idea of what I wanted to do to get the house ready to sell. Top of my mind was:
- Taking down a wall between the kitchen/dining/living rooms to create an open concept
- Replacing the countertop and backsplash in the kitchen
- Replacing ugly teal carpeting
- Updating the upstairs bath to get rid of a yellow bathtub, mustard yellow surround, and sheet vinyl flooring with bubbles in it
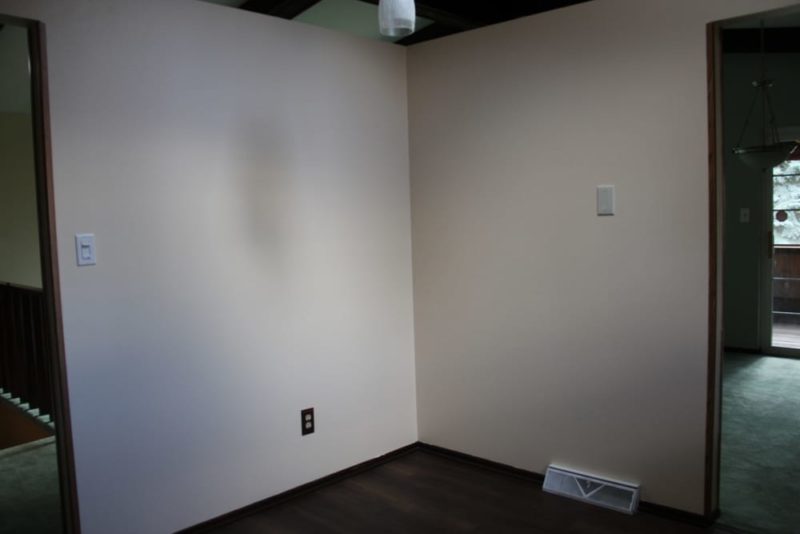
- Removing gaudy and thick stucco texture and painting dark paneling in the family
- Patching two holes in the laundry room ceiling
- Painting all the walls and ceilings
Our original budget for updates was approximately $10,000, most of which was not cash we actually had. We planned to pay for the remodel with a combination of cash on hand, a 0$ interest for 6 months cash loan from one of our credit cards, and Home Depot credit card. With a budget that small, we knew doing anything to fix the outside was out of the question, so we initially set out to make the inside as awesome as possible in hopes that prospective buyers could overlook the awful faded vinyl siding.
The first 2-3 weeks were spent researching, planning, and getting quotes. We determined somewhat quickly that $10k wasn’t going to cut it, and after a talk with the realtor about listing price possibilities, I got Chris onboard with spending closer to $15k, so we could accomplish everything on my wishlist.
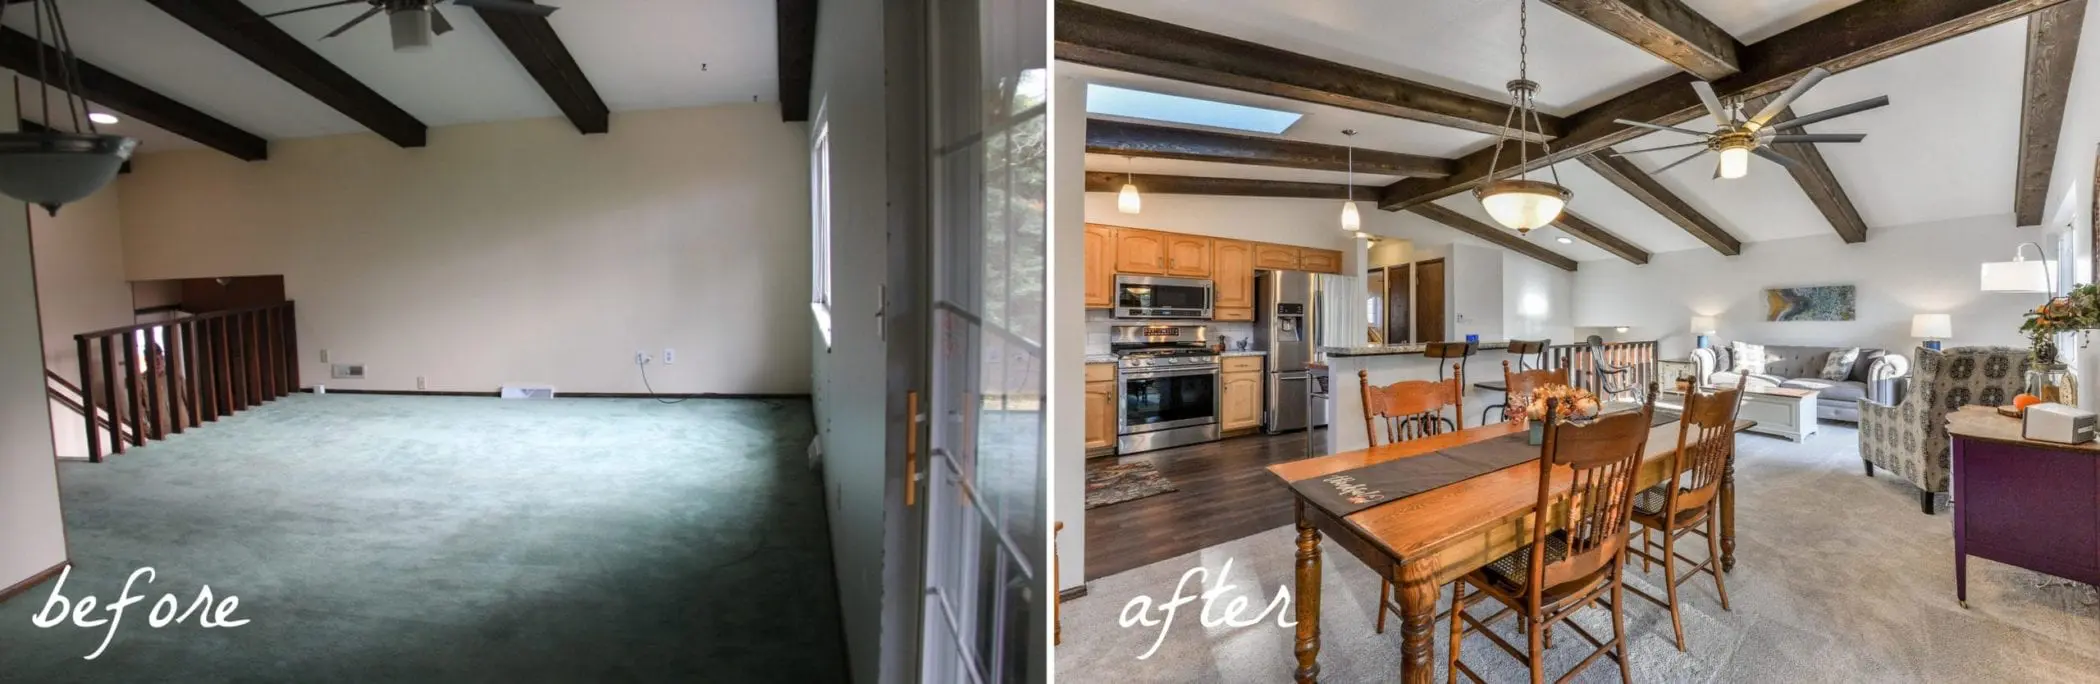
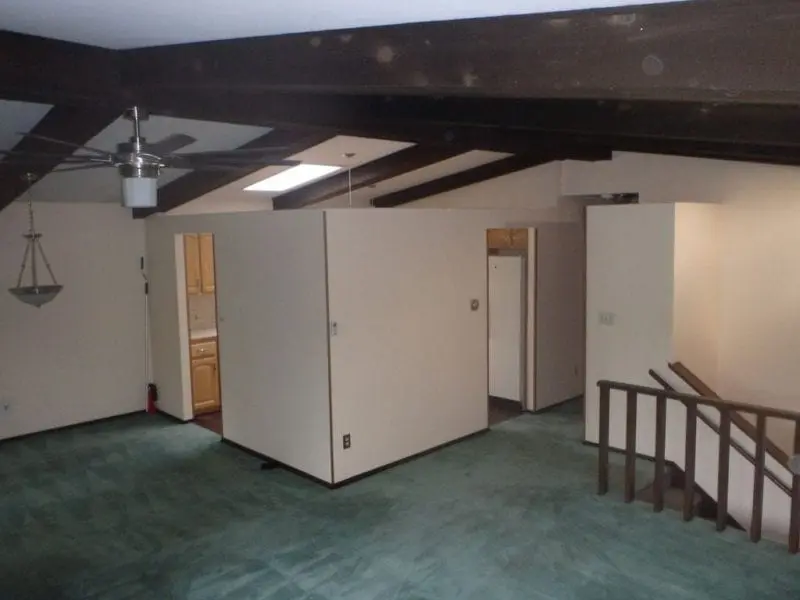
Bi-Level Remodel Before & After – Upstairs Interior
Creating an Open Concept
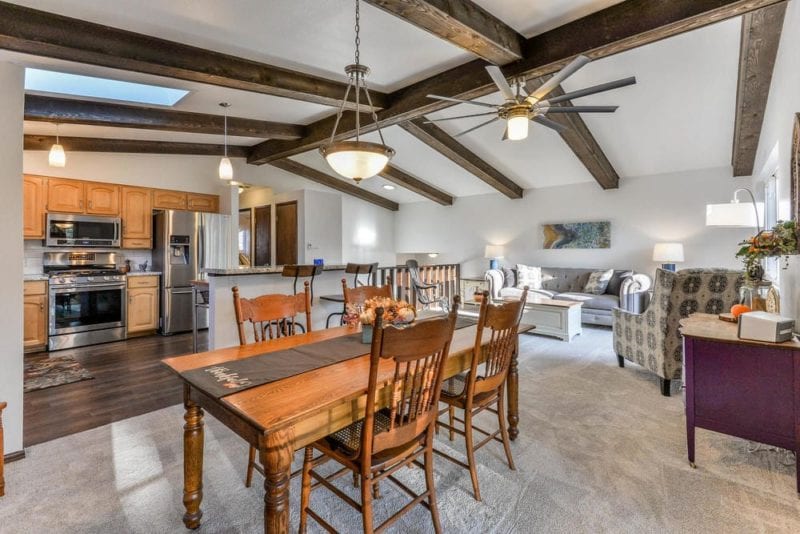
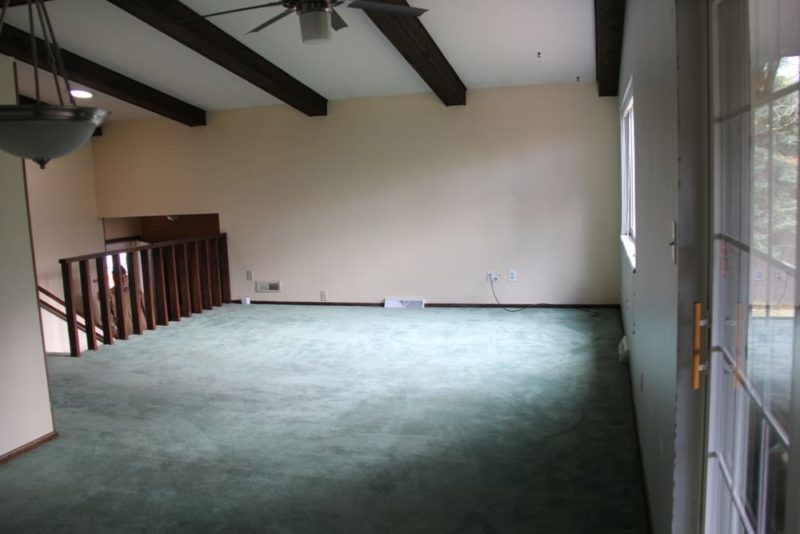
The first thing we did was take down a weird partition wall between our kitchen and dining/living room to create an open concept.
This wall was super easy to get rid of because, as you can see with our vaulted ceilings, it wasn’t load bearing.
There wasn’t anything complex on the kitchen side, either, aside from a light switch that needed to be shifted down.
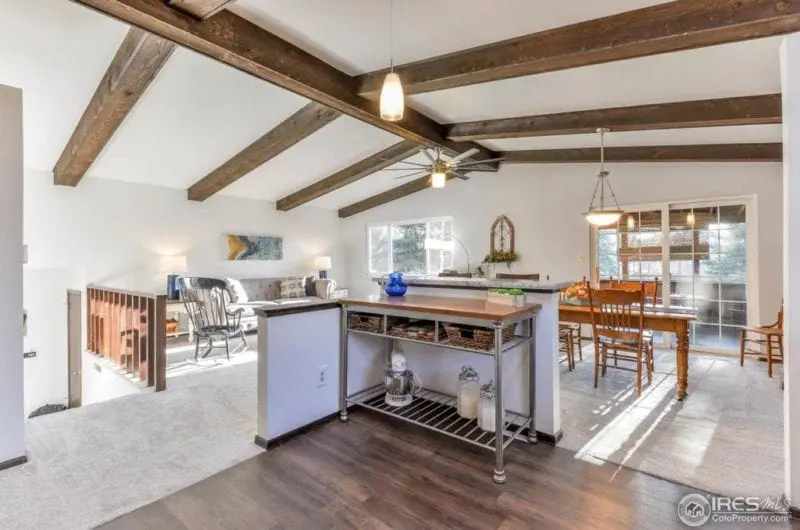
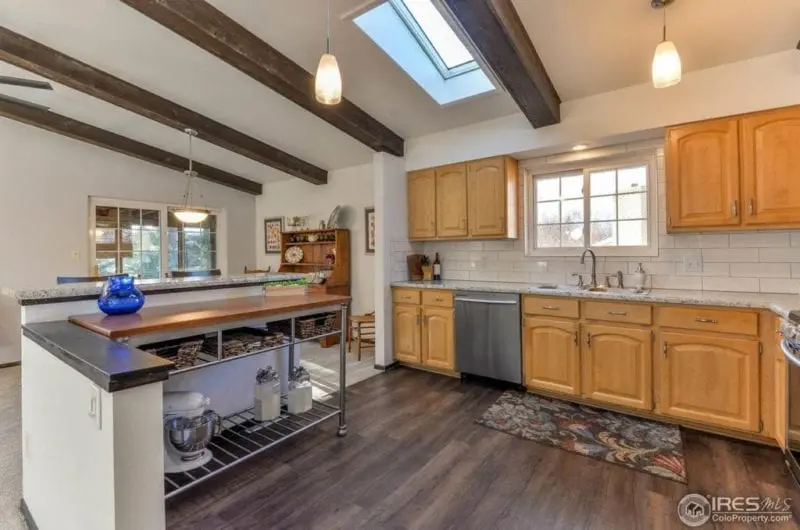
Because we still wanted some definition between the kitchen and other areas, and because we weren’t replacing the kitchen floors, I didn’t want to remove the wall completely. Instead, I had the contractor cut it down to a pony wall on the living room side and cap it off, then to bar height on the dining room side so we could install a bar-height countertop, and then widen both doorways so they felt more like wider walkways.
Because it was a really basic job, it cost us $950. It was probably one of the least expensive things that we did in the remodel and it made the biggest difference. The change was unbelievable:
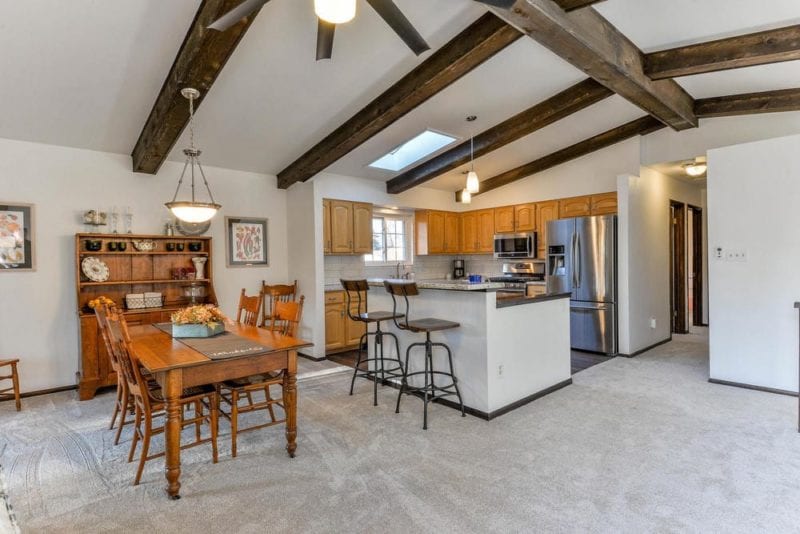
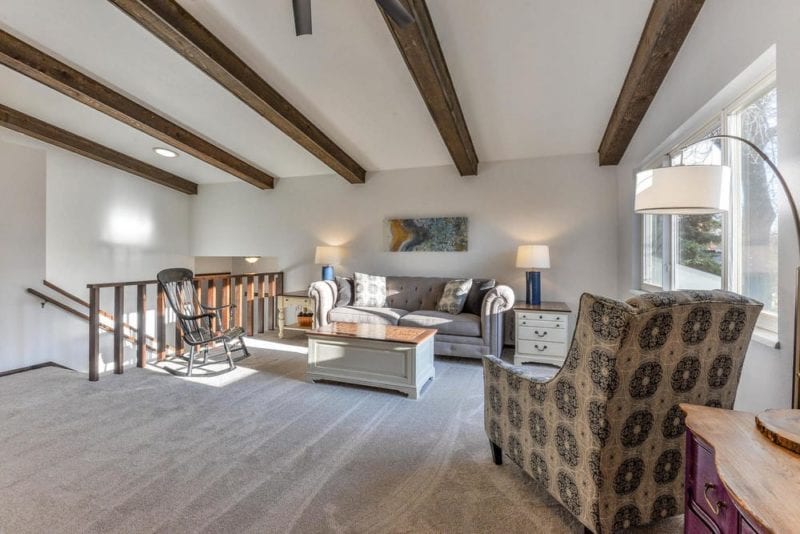
Once we replaced the carpeting and had everything freshly painted, the whole upstairs felt bigger and brighter.
Light from the skylight lightened up the dining room and the kitchen looked and felt larger.
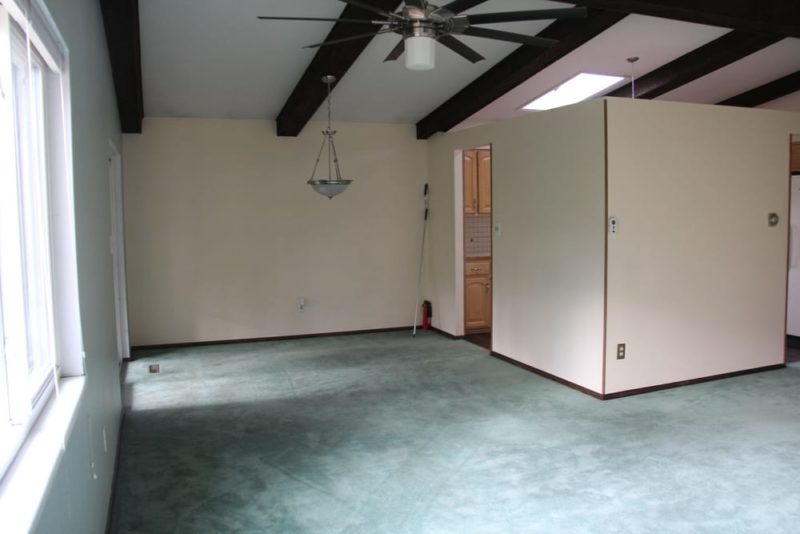
Living Room Before & After

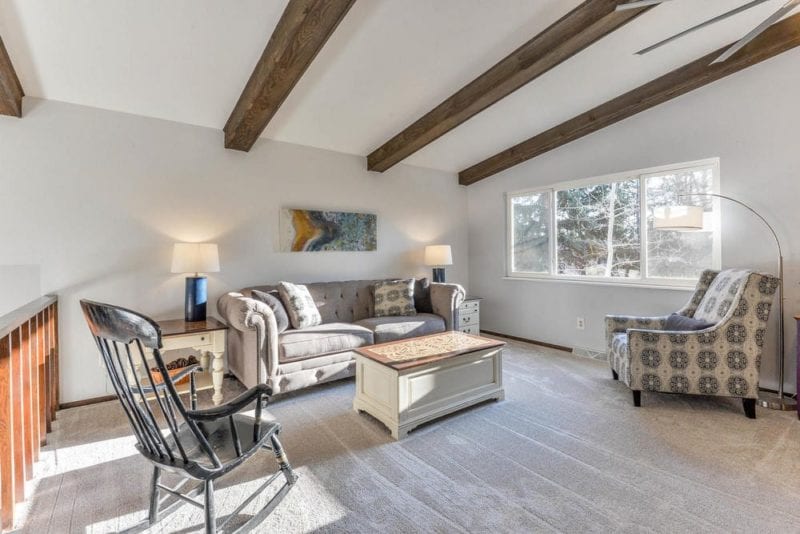
Recarpeting and painting were all it took to brighten the living room up, but paint and carpeting were no small line items in our renovation budget. Remember, this is the “designed to sell” house, so we went with carpeting to save money (if this was going to be my forever home, I probably would have picked vinyl plank or hardwood, bit for this “flip” it didn’t make sense to make that investment… and we didn’t have the budget anyway).
Recarpeting just about the entire house cost $4167.89. We put that expense on a Home Depot credit card with 12 months at 0% interest and saved money by not upgrading the pad and getting free installation. Painting this main room (entryway, living, kitchen, dining, and hallway) – walls + ceiling – was $1,810. In a past post, I mentioned that my mom (and I when I was able) painted a lot of the house (bedrooms, bathrooms, laundry, etc.) but when it came to vaulted ceilings or really complex work, we left that to the pros, which meant spending $$$ – painters are not cheap, though as you can see by the pictures, well worth the investment.
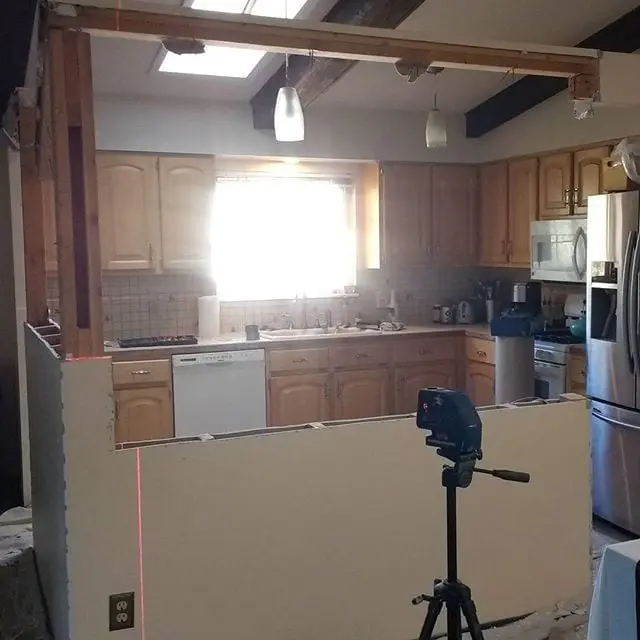
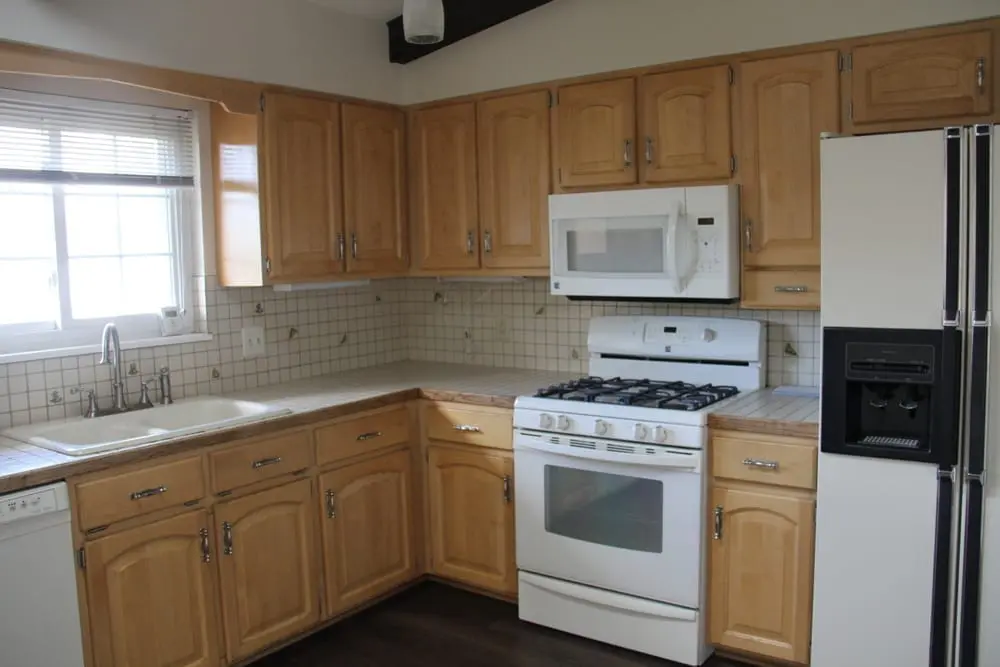
Kitchen Before & After
When we bought the house, the kitchen had a chicklet tile countertop and backsplash with a Mexican motif (little guys in sombreros sleeping against cacti, I kid you not) and really, really gross grout. We didn’t have the money for a major kitchen overhaul, but just a new laminate countertop, a subway tile backsplash, and a new sink looked phenomenal…not just in comparison.
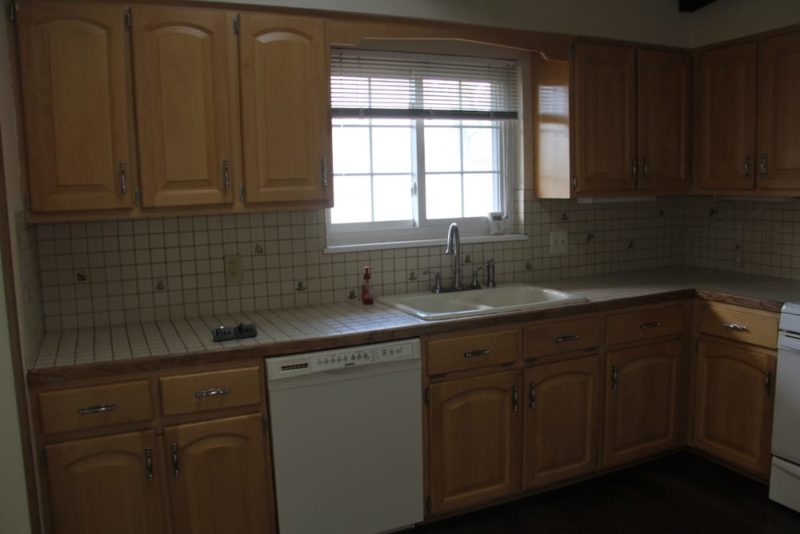
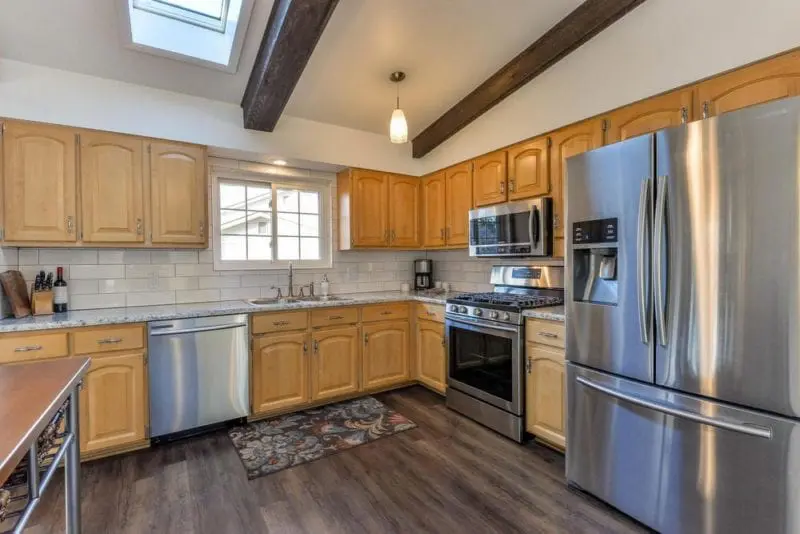
The laminate countertop was a budget-saver for sure. Like the floors, if this was going to be our forever home, we probably would have done it differently and gotten a granite or quartz countertop. I also would have painted the cabinets, too, but considering the goal, we were trying to keep our investment low. Getting new countertops and a new backsplash cost $2,620.
We already had the new fridge, and didn’t plan to replace the other appliances, however in the last two weeks realized that putting the old white dishwasher, range, and microwave into the kitchen really brought that whole main room down.
So I headed over to Lowes, applied for a credit card, and got matching stainless steel appliance for $1,326.34, with 0% interest for 6 months.
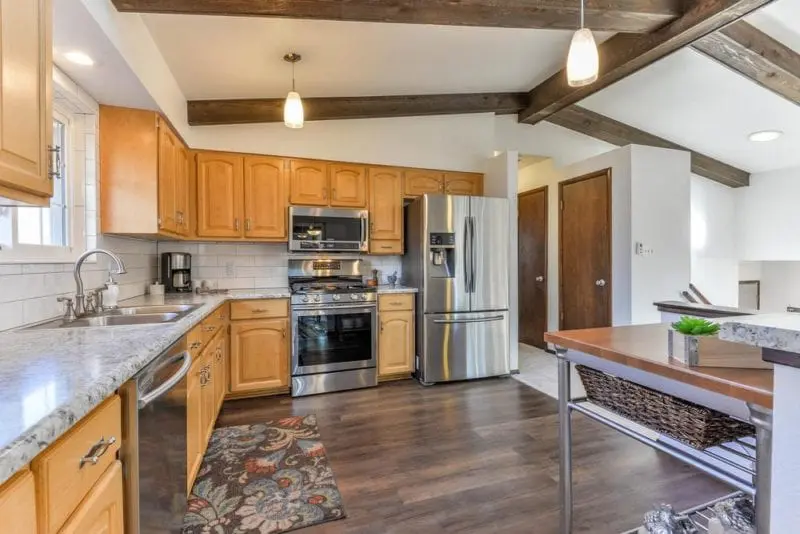
The final important investment for the kitchen was $321 for the kitchen island I purchased for staging from Amazon (at left below):
This was another shortcut to save money. If I were living here long term, I would have put L-shaped cabinets here with a countertop in place of the cap (like we saw in our neighbor’s house [JPG, 36.05 KB] when we stalked their open house), but because this was a “designed to sell” we were not going to invest in additional cabinets or countertop.
So, instead, I bought the island to fill the space so that the short walls made sense and didn’t look out of place, and we were able to take it with us when we moved. It’s actually in our office now and is the table Chris uses for food photography, so it was money well spent two-times over. You can find this island on Amazon here if you want to check it out.
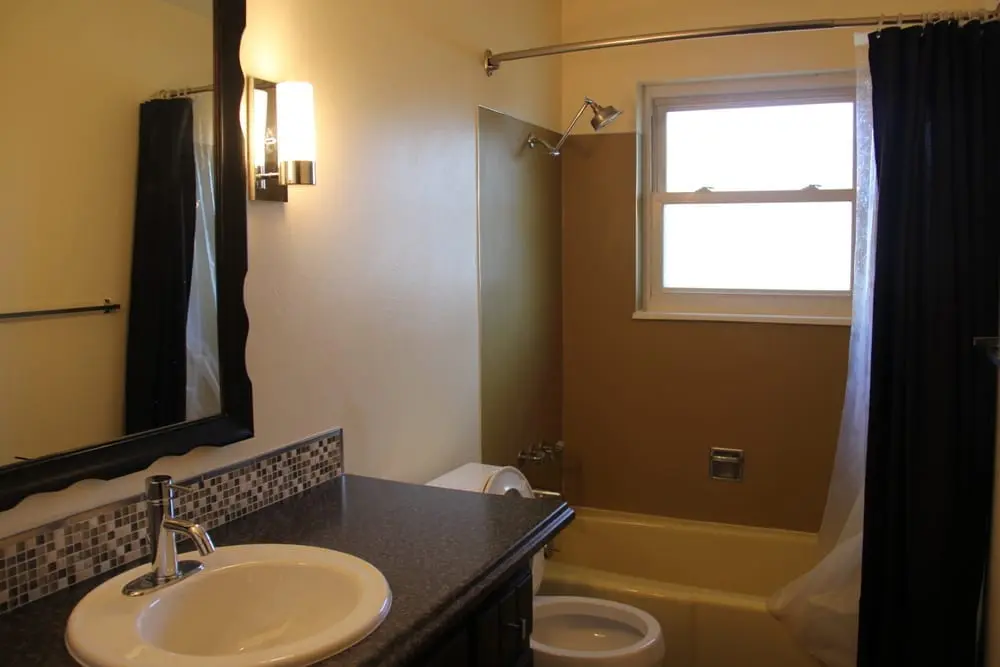
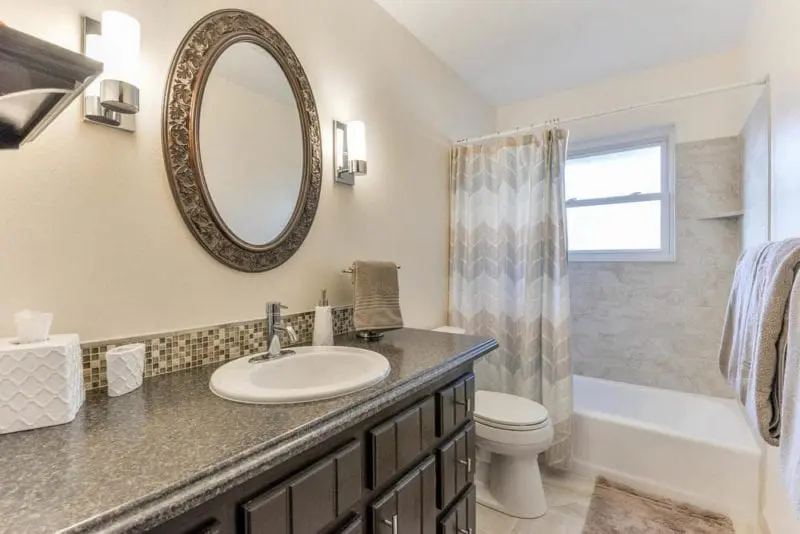
Upstairs Bathroom Remodel Before & After
Whenever our house was updated by a prior owner, they had done a partial update on the upstairs bathroom, installing a new countertop, light fixtures, and sheet vinyl flooring. But they didn’t touch the fabulous yellow bathtub or mustard yellow surround.
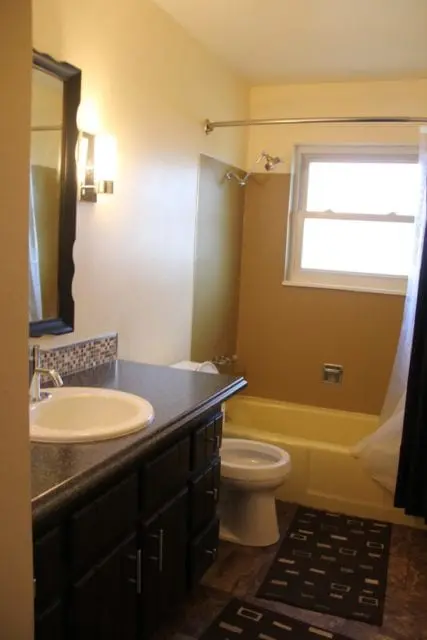
This was the main bathroom in the house and it did not look great. The yellow had to go. $2,182 later, we had freshly painted walls and ceiling, the tub was reglazed to look white, and we had a new ceramic tile floor and tub surround.
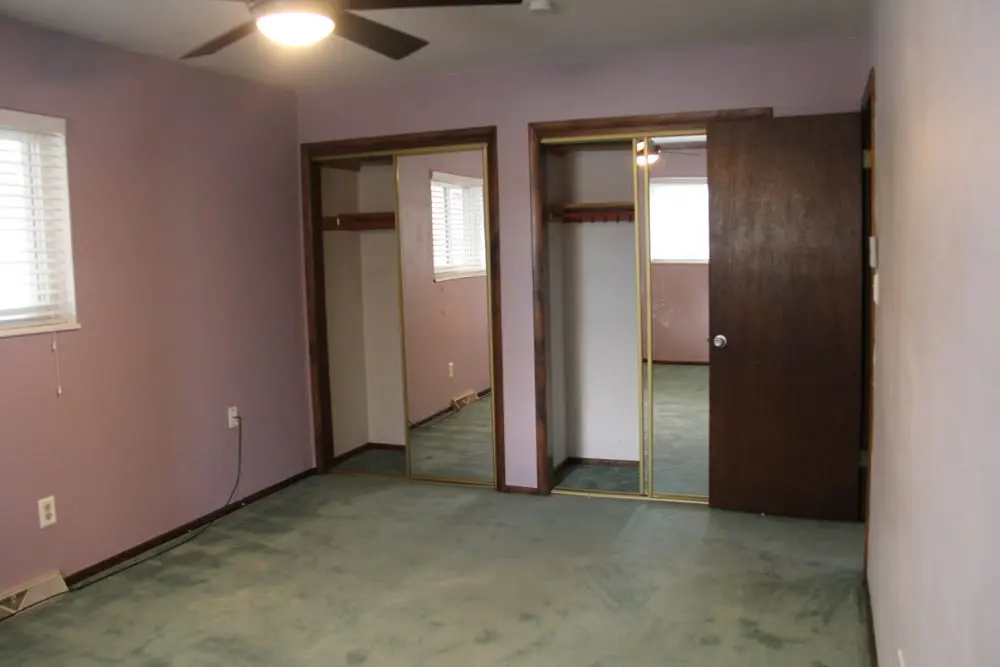
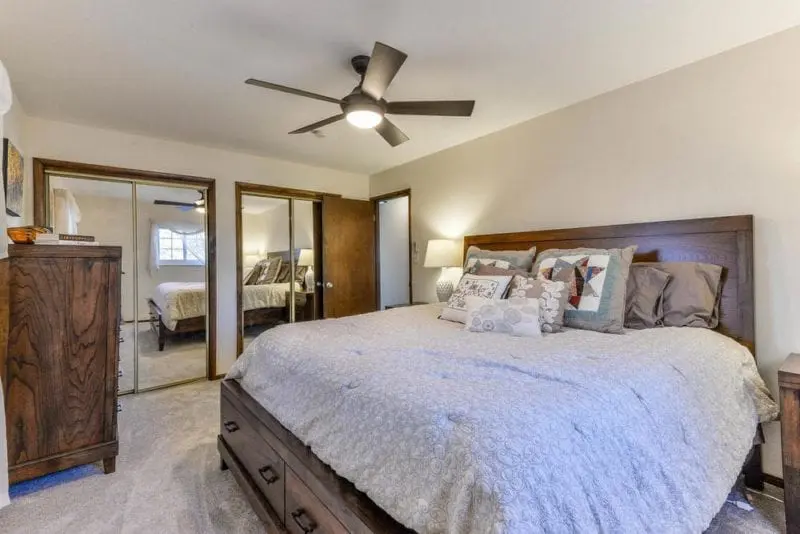
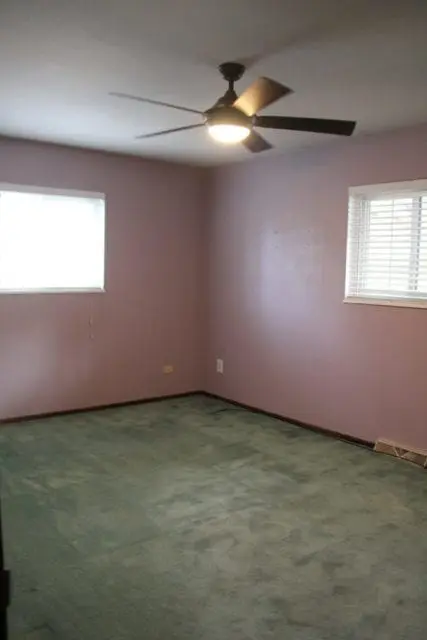
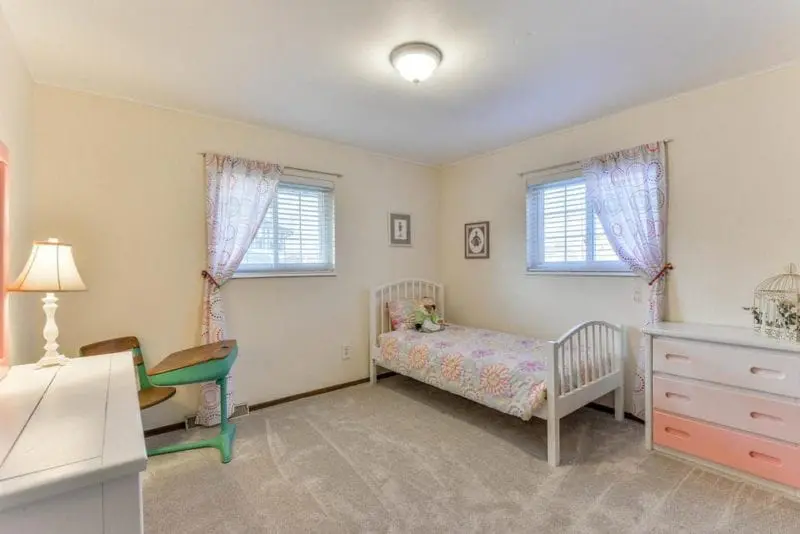
Upstairs Bedrooms Before & After
The two bedrooms upstairs got a similar treatment – new carpeting and a fresh neutral shade of paint (no more lavender and teal master bedroom!), plus a general de-clutter and rearranging of furniture, along with hanging currents and changing out/moving around wall decorations.
Master Bedroom:
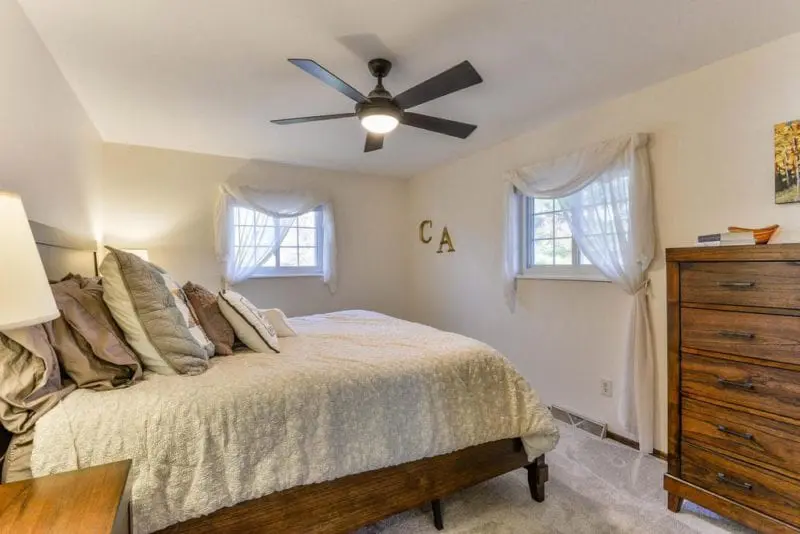
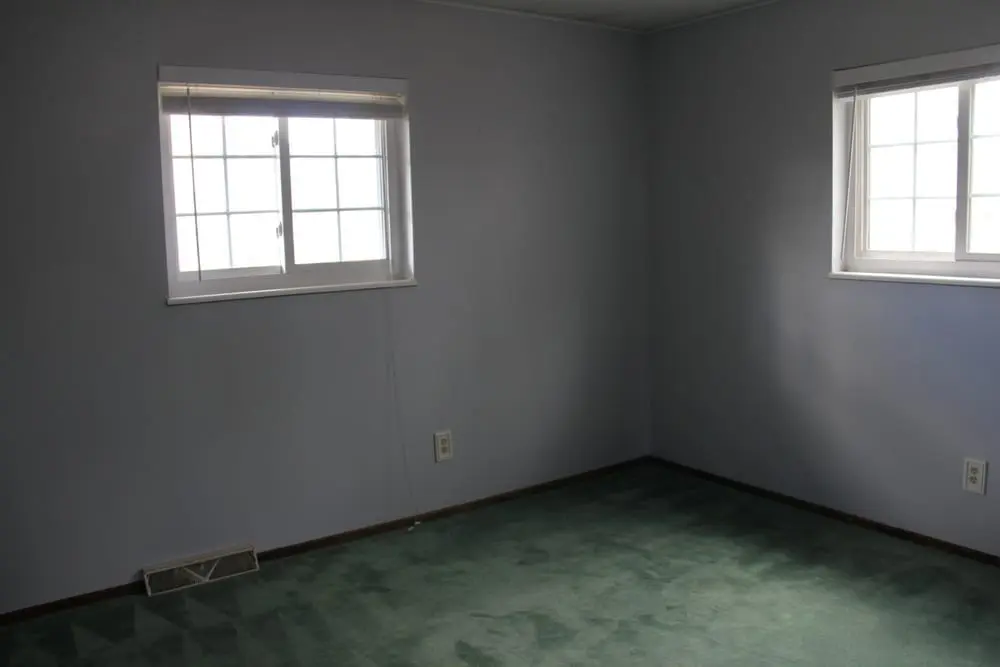
Bedroom 2:
Stay tuned for part 2…
I hope you enjoyed the first half of our renovation story – check back for part two, or join my email list to see when it goes live. You don’t want to miss the amazing before/after transformation of our family room from basement tavern to a place where you’d actually want to hang out. Plus, I’ll tell you the story of the exterior portion of our remodel, which we practically got for free, and give a final break down of sales price – our investment, so you can see what profit looked like.
Leave a Reply